RENEGADE GARDENER™
The lone voice of horticultural reason
Steps to Renovating Your Front Foundation Bed
11-4-15 – Not a very sexy title for this all-new, do-it-yourself landscaping article, but I’ve come to realize that getting too esoteric with column titles can camouflage the content. So this time around, I’ll make it easy for you.
Lots of photos, with captions (yeah, the captions may tell you more than you need to know), that’s my plan for conveying gardening tips and landscape design insights this fall and winter. Except for the odd month I get ornery and petty and discouraged, and publish a 3,000-word tirade on how easily smart, earnest gardeners are led down pathways to despair and failure by the gruesome panoply of for-profit players comprising the current American gardening industry. Adjusting to the times, I will of course label these with trigger warnings, to protect recent college grads.
Oh, and before we get started, to the tens of thousands of Renegade Gardeners around the globe, welcome back! This smoking, creaking, venerable old site now enters its seventeenth year, and if you’re new to the party, I update the site with fresh content once a month, November through May. You can sign up for e-mail alerts to receive notice of each update. Be sure to click on Top Pick, Myth of the Week, Plant Spotlight and Don’t DO That this and each month; you’ll always pick up something that will help you become a better gardener.
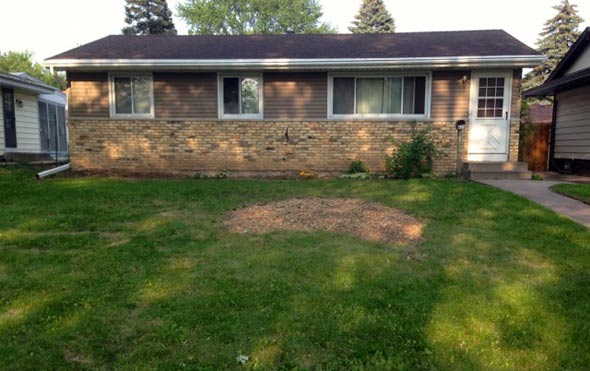 |
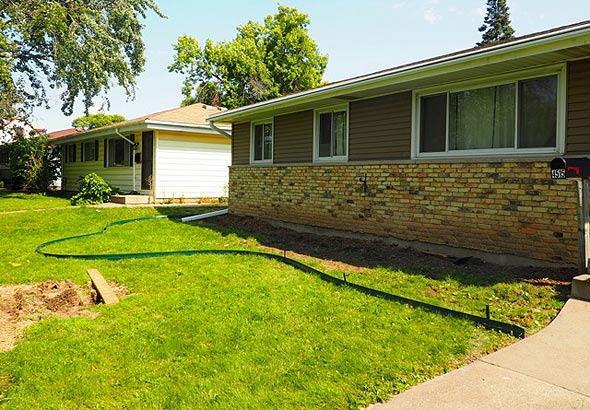
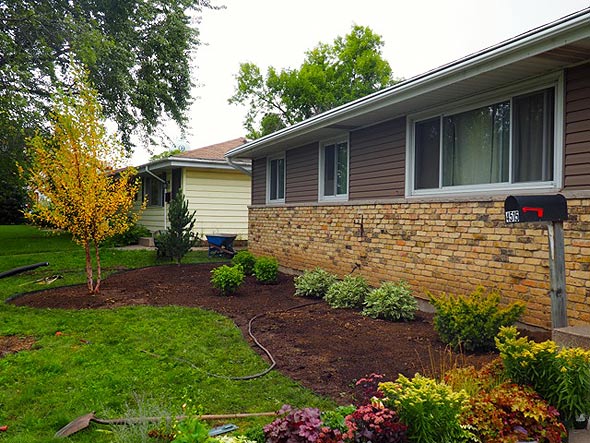
| A classic scenario: Built in the 1950s, the front of the house was “landscaped” via a straight-line, thirty-inch-wide foundation bed. The new homeowner had removed most of the desperate, overgrown plant material before we arrived. A large elm had occupied the front yard, died, and been removed, as evidenced by the oval area of stump removal chippings. Note that the elm had been planted at a point one-third in from the right side of the house, so the original landscaper at least got that right. For more information on the importance of the “rule of thirds,” come back up here when you finish and read my article Why Beautiful Landscapes are So Odd. |
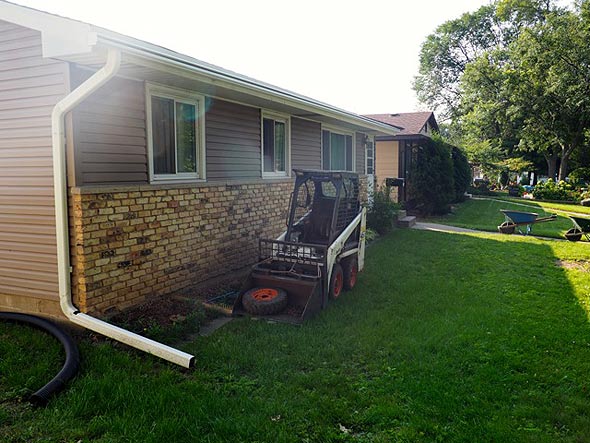 |
| The Renegade Gardener and crew arrive. The homeowner wants a new foundation planting that includes a tree, so the Bobcat is there to facilitate planting of BB (ball-and-burlap) material. The downspout on the left needs addressing – we are going to expand the bed greatly, such that the white, near-horizontal downspout end piece will flood he bed, not lawn, during heavy rains. Plus, these old-fashioned systems restrict where you can plant stuff, in addition to besmirching the look of the finished landscape. We’ll replace it with an underground NDS drainage system, easy to do. |
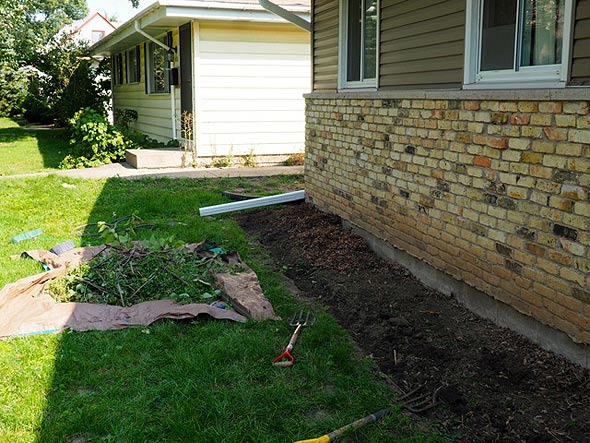 |
| Here we’ve finished removing the remaining shrubs and wide range of weeds. This bed had everything, marauding lawn grass, two- to three-inch woody weed trees, African violets, and a dozen varieties of annual weeds. It’s very important to do a thorough job of weed removal when renovating an old bed. Should you discover Lily of the Valley, Snow on the Mountain, Virginia buttonweed or Houttuynia cordata (Chameleon Plant), don’t waste time renovating the bed, sell the house. |
 |
|
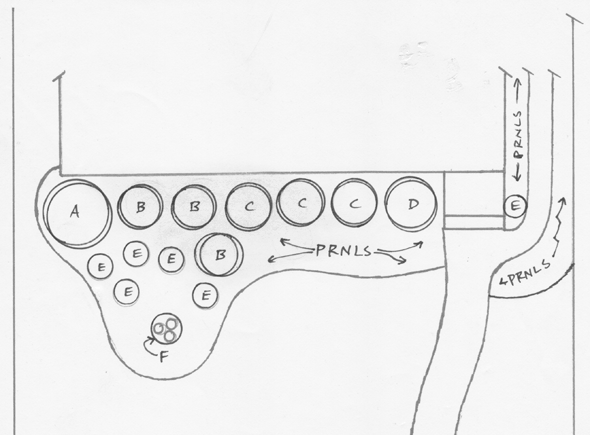
I actually did a sketch for the homeowner for this one, a rare occurrence, usually laying out the bed line with a long rope during the initial consultation along with a plant list suffices, but the client wanted a sketch, so sure. The homeowner desired a collection of colorful shrubs in front of the house, plus some perennials, so of course the most important step when doing this yourself is to kick the bed out wider than the narrow little tutu of plants girdling your house the first time around. You don’t need to draw a plan if doing it yourself. It’s easier to “paint on site, ” that is, lay out the bed(s) right on the actual site, as shown in the next photos. Here’s the plant list: A – Pine ‘Silver Whispers’ (Pinus) Dwarf, 12’ tall by 6’ wide |
 |
| Here I’ve established the bed line, or concept line, as it is called in the design trade. I’m using Permaloc aluminum edging to do this, the very pieces that will be installed in the ground, because it is supremely flexible and you can move it around to get the concept line that works for you. Rubber hoses or a 100’ length of limp, supple, ¾” rope work also. |
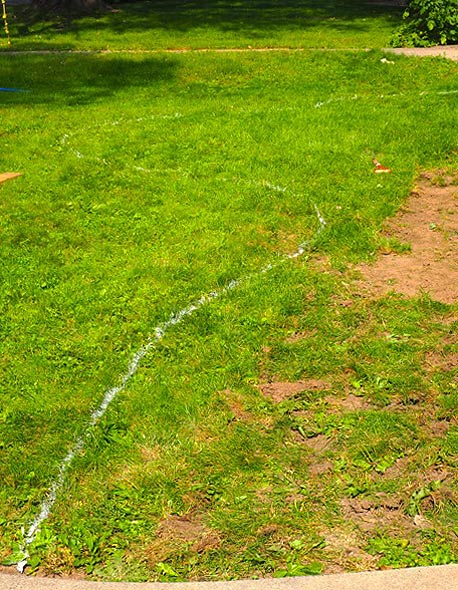 |
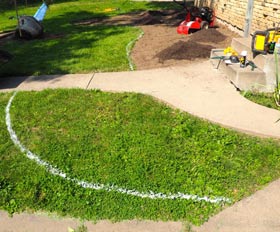
| Next step, paint along the edging, (old) rubber hose or rope with ground-marking spray paint. The paint is hard to see in the photo but it’s there. If you use Permaloc edging for this (search “Permaloc”) be sure you have the pieces right-side-up so you don’t get paint on the minute top portion of edging visible after it’s installed. Now we can remove the sod and edge in the new concept line. |
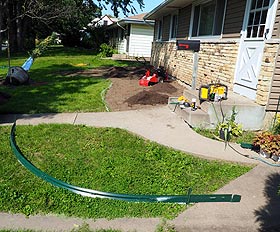  |
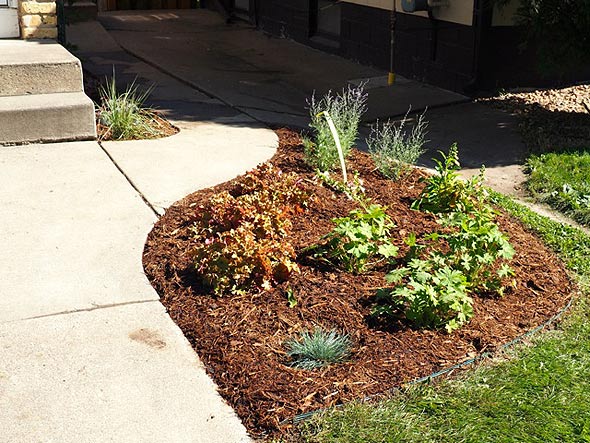
| Same thing here, creating the bed for the right side of the sidewalk. I call this “jumping the sidewalk” and it’s a good idea, we are creating a large new bed to the left, if we leave this ratty little patch of lawn to the right, it’s all out of balance. Note also we are preparing to rototill in one yard of compost into the new bed. Results of the laboratory soil test showed that pH was neutral but the soil lacked organic matter. If you want your renovation to be a success, don’t skip the step of having the soil tested and improving it as needed. |
 |
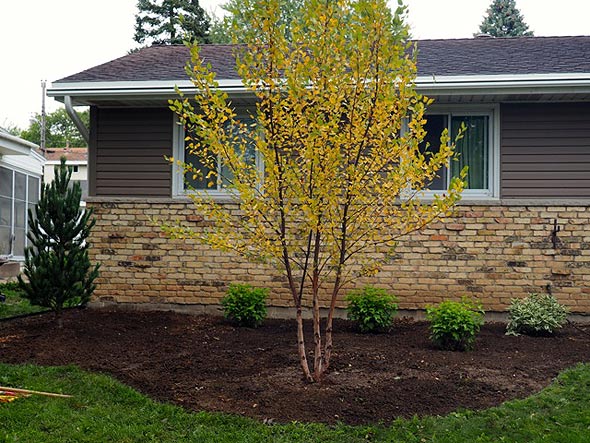
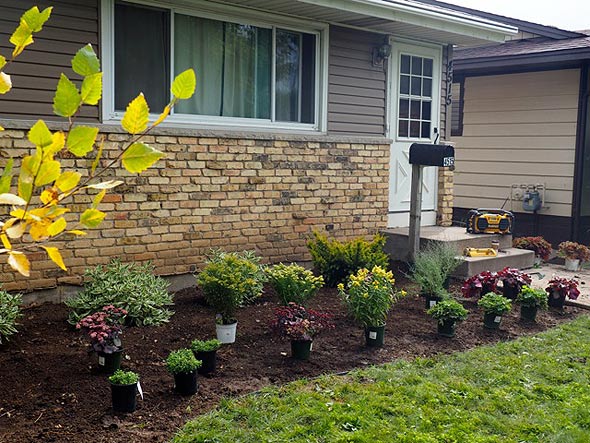
| OK, let’s start planting. Here, the trees and shrubs are all in. Remember, the shrubs are going to get quite a bit larger – a new landscape should look a little sparse. Note there are three anchor plants – the dwarf Pine on the far end, the birch (planted one-third in from the left) and the Yew ‘Dwarf Bright Gold’ next to the front door (it will grow taller and more prominent in years to come). The two evergreens are essential to provide four-season interest. The birch is the diva, out front and prominent. |
 |
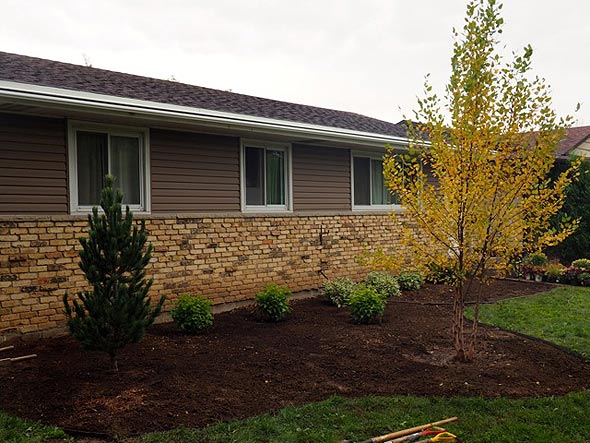
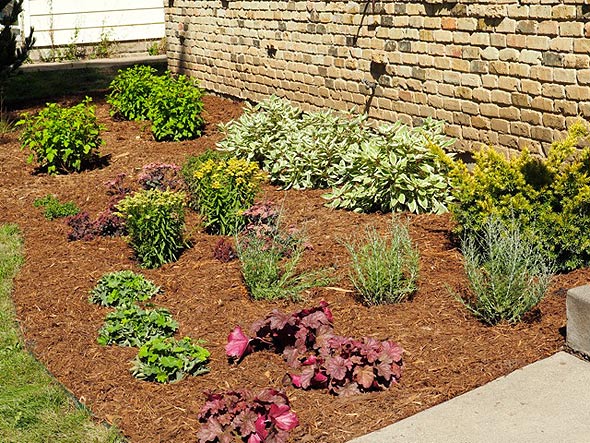
| Note that the three small Ninebarks in the rear of the photo are not planted in a line along the front of the house. I curved them out, to give some movement, to sweep as a backdrop to the birch, and basically so that all the foundation shrubs are not plunked in a straight line across the front of the house. Don’t let the straight lines of your house foundation dictate your design. The Ninebark on the right, farthest from the house, also serves as the end to the perennial plantings that will flow in front of the Dogwoods and toward the front door. Scroll back up to the sketch and you’ll see this more clearly. |
 |
| A different view. |
 |
| Here we’ve added the five grasses, as they clump up and mature this will lend an ersatz naturalized look to the left side of the bed, the lovely clump birch flowing into grasses and into the anchor pine. I chose the golden grasses for good color contrast to the dark green pine and the birch (exhibiting fall color in the photo, the birch is green-leaved spring and summer). |
 |
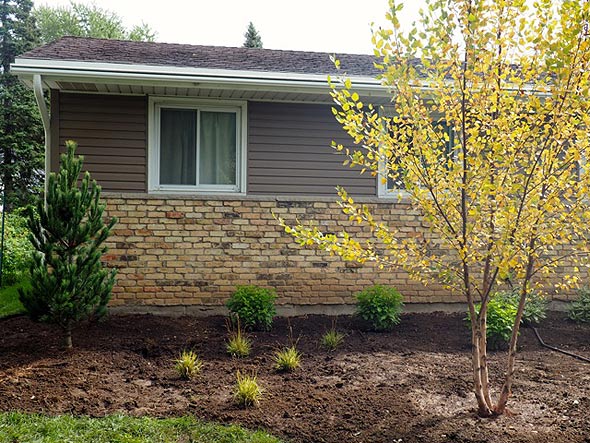
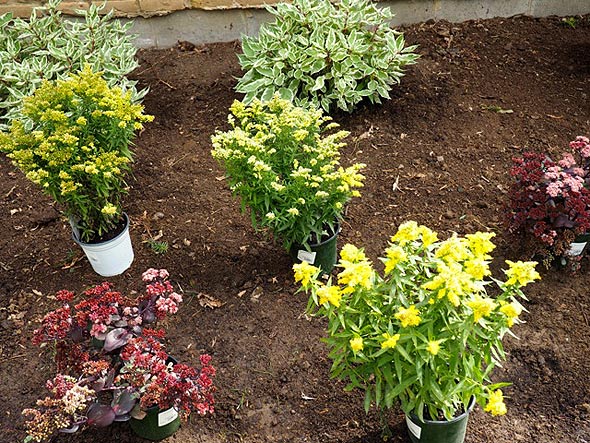
| Next, add the perennials. Do it this way, you place perennials in their pots and move and shuffle them and play chess until you have the best look. |
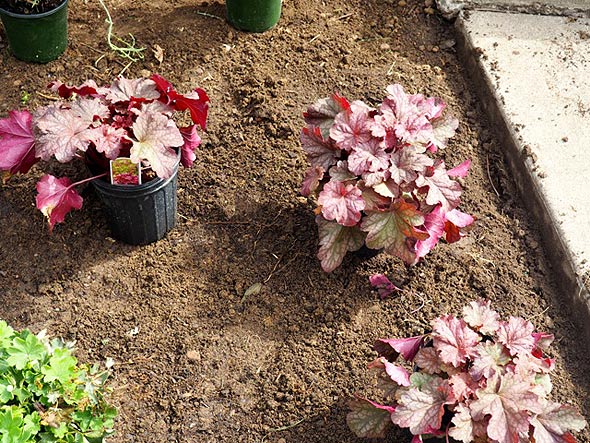
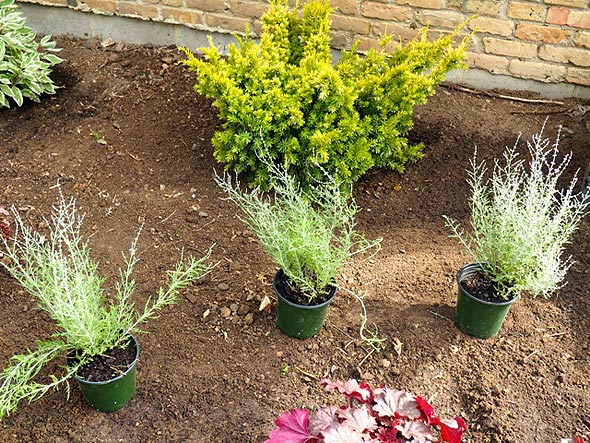
| Here are some photos of the perennials, no captions, just to give you an idea of how to plant perennials in waves, in curves, triangles, etc. I used three of each. The single most important design consideration when selecting your perennials is to have a collection offering strong contrast between the plant form and size, shape, and color of the leaves. Bloom color is a secondary concern. |
 |
 |
 |
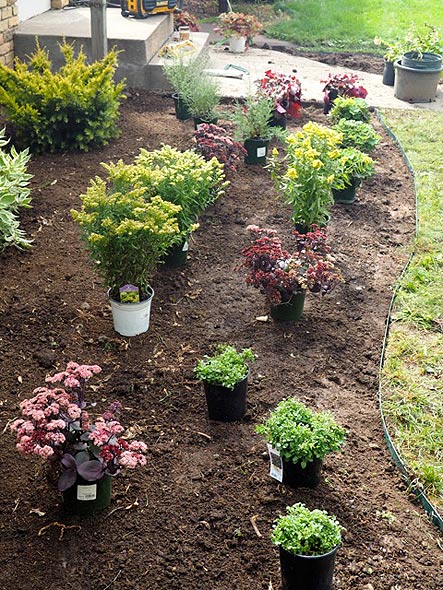 |
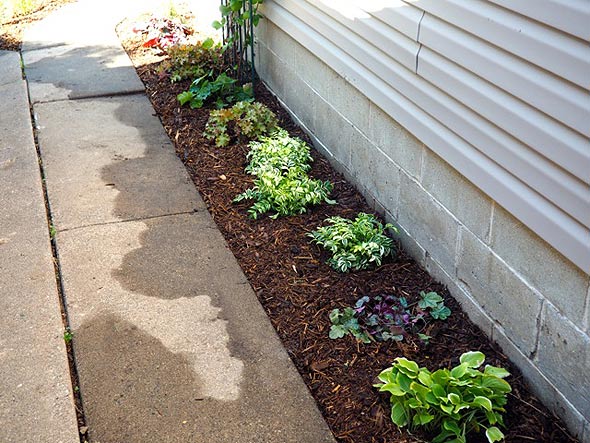
| Do want to note that I used one perennial, Sedum ‘Xenox,’ as a single. You see it above staggered front left, then middle right, then upper left again. Take one variety with prominent foliage (in this case, purplish-red) and stagger it as a single through the bed. Remember, all these perennials will get larger and fill in. We planted using 18 – 24” spacing depending on mature size of the perennial. |
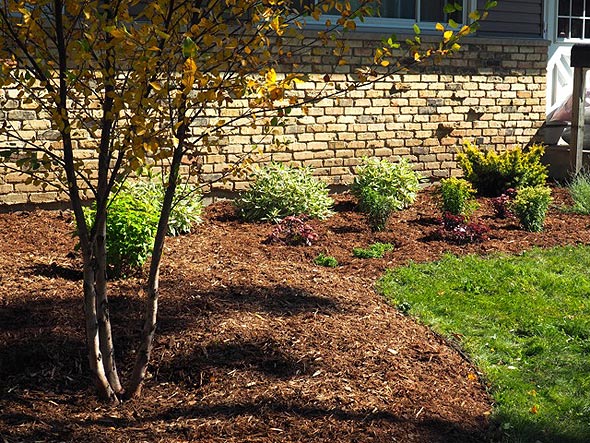 |
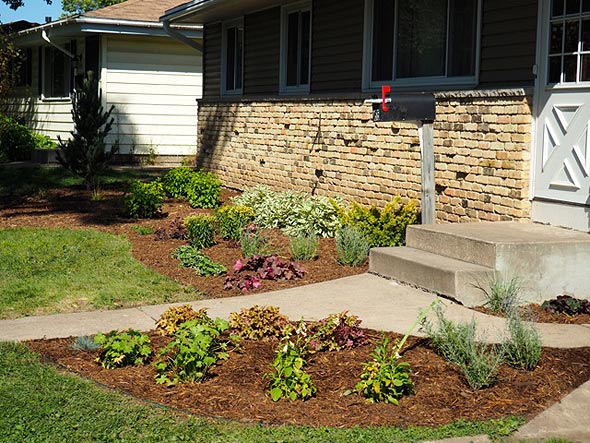
| OK, final step, we mulch ‘er up and call it a day, or three. I’m using shredded bark mulch, 3” deep throughout the beds, being careful to leave a soil circle around each plant – don’t mulch 3” deep around the base of plants. |
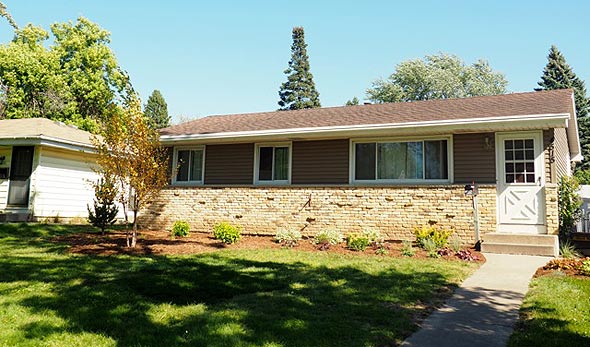
| Let’s close it out with a few general photos of the finished job. E-mail if you have questions. See you next month. |
 |
 |
 |
 |
 |
Don Engebretson
The Renegade Gardener