RENEGADE GARDENER™
The lone voice of horticultural reason
Let’s Get Rockin’
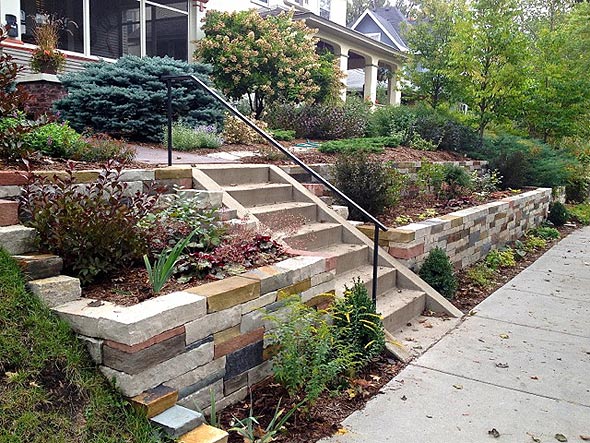 |
| A funky terraced wall I built and landscaped this spring in St. Paul. |
Cancellation by the homeowners of the final stage of planting, next week, of fall-dug, three-inch Fall Fiesta® maples (new home construction on sopping clay soil which they miraculously had sodded last week, they want to wait until spring) marked the end of my landscaping season, a day or two ago. We’ve had a couple of frosts in the Twin Cities, it’s chilly at night, and the snow will come soon enough. Most area landscapers are packing it in.
You landscapers in Washington and Texas and Virginia who read my site and chime in on occasion, mainly ribbing me about landscaping up here in the tundra, y’all have fun the next five months getting up at 5:30 a.m. to slog on with your landscaping seasons. I’m sitting in my cozy den in my underwear sipping coffee around noon on a Tuesday as I write this. Just got up. Had a good season. I don’t have any real work to do until May, 2014. Have some trees to plant.
I’m installing more and more boulder fountains, and thought a pictorial how-to on their installation would make a good subject for this first full update, so I’ll start that here in a second, after a quick bit of housekeeping.
Thank you, and welcome, to the many newcomers who stumbled onto the site in the past year, and signed up for the automatic e-mail alerts. Smartest thing I ever did. You will get an e-mail each month alerting you that the site has been updated. This way I don’t feel quite as guilty if I don’t finish and post the new update by the first of the month. I had laundry to do. If you get the alert and go to the site and it’s last month’s update, refresh your browser, and perhaps consider dropping AOL.
This update marks the return of the site to active mode, wherein I write and post a new Current Column each month, and post all new feature articles under the Plant Spotlight, Top Pick, Don’t DO That and Myth of the Week feature buttons. New monthly updates continue through May 1, 2014. Then I go back to work. I think that’s about it. So let’s get rockin’:
Installing a Boulder Fountain
 |
| Adding the sight and sound of water to the landscape is a must in my book, and not terribly difficult to obtain if you opt to install a boulder fountain. Boulder fountains require much less digging, time and expense than a pond or stream system, and far less upkeep. Homeowners easily can handle installation of a small to medium size boulder fountain, or small to medium size basalt column fountain. |
For this article I’ll detail the installation process for a triple basalt stone fountain, but the installation engineering I’ll explain is generally applicable and helpful if you plan to install a drilled boulder fountain.
 |
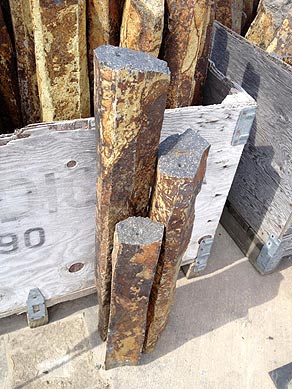
| Crates of predrilled basalt fountains at my local landscape supply yard. |
Basalt is a fairly common igneous (volcanic) rock found across the US and the world. Most of the basalt used in the US landscaping industry comes from California and the Southwest. You will probably find predrilled basalt columns for sale in your area, at larger nurseries and landscape supply yards. You will also see predrilled granite boulders – often with colorful striping, or intriguing shape – at the same venues.
The landscape we were creating for some wonderful St. Paul clients was quite fanciful, artistic, a fairly small back yard divided into five “rooms,” and when I pitched them on installing a triple basalt column fountain as the focal point in one of the rooms, they were all in.
I’m going to switch now to photos with my written captions. I don’t have to write so many words, meaning you won’t get nearly as confused.
 |
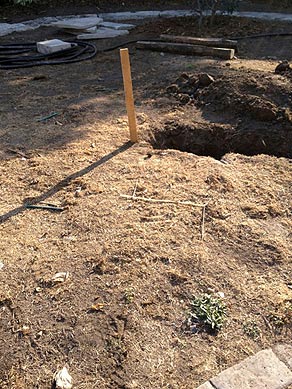 |
| From the crates I selected three columns, about 30” tall, 24” tall, and 18” tall, mixing and matching until I found three that looked good together. You will find fatter columns that look good as a single column fountain. Or group five together. But never two or four. | At the job site, I’ve marked the fountain location with a stake, and one of my guys has dug a trench up to it, for electrical. |
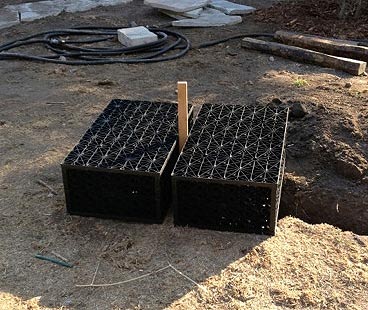 |
The pump that feeds the fountain will have to sit in a water reservoir underneath the fountain, and the great product developed to help do this is called AquaBlox. These are very strong, ribbed plastic boxes that the fountain will site on. I used two, for ample water volume and pump access, and have set them in place so I can mark for the excavation. |
 |
Make your excavation a few inches wide all around, to allow for the liner and liner fabric. I haven’t put those in place yet, I’ve set the AquaBlox first to check that they are level. When using more that one AquaBlox, secure them together with plastic zip ties. I’m also thinking about final base height of the fountain at this point; the boxes are about three inches below grade, because I need to cover the fountain base with around three inches of beach pebbles. |
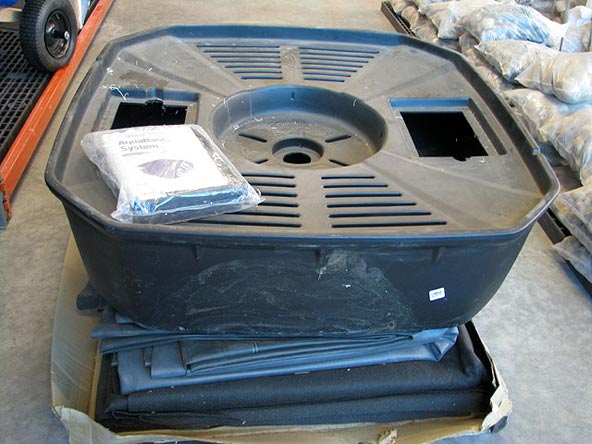 |
| There is an alternative to the AquaBlox system, named AquaBasin, a plastic tub that comes in various sizes. In the photo you can see that the liner and liner fabric are cut and folded underneath it, ready for installation. I like the AquaBasin system for large pondless fountains, AquaBlox for small fountains. |
 |
 |
| The basalt fountain needs to stand up (something that makes boulder fountains an easier project). Some people simply stand them up on the AquaBlox and let the final application of beach pebbles hold them up, but they can fall over, from the vibration of the pump and water, hit by an errant football, a limb in a storm, a dog goes up for a sniff or a pee. Set them in concrete. I buy a cheap plastic pot of the proper size, cut it to 3” tall, set the column or columns in the pot, and fill the base with concrete, securing them to a nearby fence to keep them upright while the concrete sets. | Small column fountains are drilled at the base with a ⅜” hole, and the supplier will give you these ribbed, plastic, ⅜” inserts. Pound them into the hole at the base of each stone with a hammer, pretty firm, so you see them go in. |
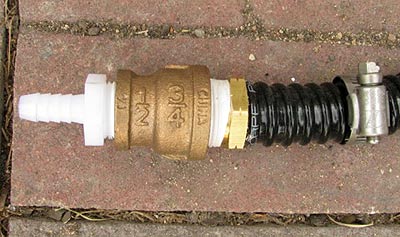 |
| You’re pump is going to have a ¾” flexible hose running from it to each basalt column, and the columns will accept only ⅜” flexible hose, so something has to give. Above you see the components you’ll need to take the ¾” hose down to ⅜”. You’ll find everything you need to do this at your local big box hardware store. |
The pump you purchase – for this fountain, I used an Aquascape 2000 – will come with an accessory that is basically a three-way splitter. It’s a plastic piece that screws onto the top that allows you to run three water lines from the pump. These lines will be ¾ or ½ inch, depending on the pump manufacturer. Should have taken a picture of this, but when you go to buy your pump, tell them it’s for a triple column fountain, and they’ll explain and include this accessory. Just remember, you need to consruct three of the hose systems, each about ten inches long, that I show in the photo above.
 |
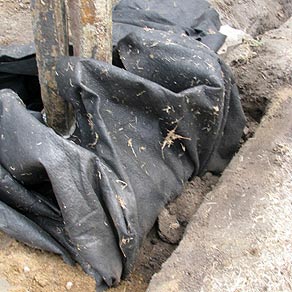
| Your hole should have a flat bottom and straight sides, check it for any stones or sharp root tips, particularly on the bottom. First lay the liner underlayment fabric, creating pleated folds at the corners. Your pond liner goes down next, same thing, lay it flat and buy it big enough where you have a good two feet of excess beyond the edge of the hole. Before you install the AquaBlox, cut a section out of the top along one side, using a Sawzall with a fine-tooth steel blade. This allows you to place the pump down into the AquaBlox. Again, I used two AquaBlox instead of one, because had I used only one, the pump would have been directly underneath the fountain, instead of underneath and beside it, where I can get at it to hook up the lines, adjust flow during the season, and remove it easily for winter. Retain the top piece you cut, this snaps back onto the top after the pump has been inserted and the lines hooked up. |
 |
 |
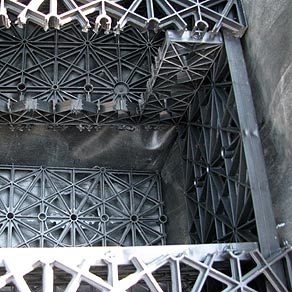
| OK, a little more sophistication, but nothing you can’t handle. In this photo you are looking down into the Aquablox. Turns out, the triple splitter piece that screws onto the top of the pump also makes the pump taller, by about five inches. This made the pump taller than the small AquaBlox I used (they come in larger sizes, but that would have meant a far larger hole and more water volume than needed). So when I dug my hole, I dug a portion of the bottom deeper by about seven inches, beneath where the pump will sit. I cut out a section of the AquaBlox from the bottom, directly above this deeper area, and placed this piece on the liner, for the pump to sit on. (Not absolutely necessary, a pump can sit on a liner, but I had the perfect piece.) I then cut a section out from the inner walls, to open up a compartment alongside the pump where I can feed the lines from the fountain to the lines coming from the pump, and have room to do the attaching. | Next step is to move the fountain onto its place atop the AquaBlox. Depending on size of fountain, this may take two people. Use plastic shims to get it straight. Then fold the pond liner and underlayment fabric over toward the fountain, and fill in the spaces between the liner and edge of the hole with dirt, adjusting grade so you have a slight slope from the edge of the excavation down to the top edge of the AquaBlox. Then lay the fabric and liner back where it belongs. Put the pump in place. Attach a foot or so of ⅜” rubber hose to the base of the first column, sliding it over the little ribbed peg in the base, and secure with a hose clamp. Repeat for the other two columns. Run the other ends of these hoses down into the AquaBlox, leading them into the little room next to the pump, cut them to desired length, and attach them to the ten inch-long lines you made that take the ⅜” hose up to ¾”. Now attach the ¾” ends to the splitter piece on top of the pump. If you need to remove the pump for winter, don’t ram the hoses far down the ribbed splitter attachment. Secure with hose clamps. Remember to run the cord from the pump out of the AquaBlox and off to the side. Fill the thing with water. |
 |
| This photo is a close-up of what you wind up with. You can see the plastic pot, and the fountain, in the reflection in the water on the left. Straight down you see the three lines coming up from the splitter on the pump, which is directly beneath the splitter. These lines have been angled over into the little side compartment I had you cut into the AquaBlox. The middle of the three lines, at the top of the photo, you can just see the hose clamp that is securing the ⅜” line from one of the columns. The electrical cord for the pump is rising out of the water on the far right. Plug it in. You can adjust the volume of water flow for each of the columns by adjusting the three simple valves at the base of the splitter. |
 |
Here’s the fountain during its first test run. The valves on the splitter are turned nearly all the way down, I have enough pump to shoot water straight up eight inches, but I like boulder fountains gurgling, enough water to dampen the stone and make some noise, but not shoot a column of water into the air. Once you have the pump adjusted, and have made sure your hose connections are holding under pressure, you can put the top back on over the pump area. I should mention that you need to plug the end of the pump cord to an extension cord, wrapping this connection with plastic and electrical tape, and leave it near the base of the pump either covered by the base stones, or mulch. Run the extension cord underground through 2” PVC pipe to an exterior electrical outlet (that’s the code). Trim the excess underlayment fabric and pond liner to leave just enough circling the fountain to handle any splash. All that’s left is the final dressing of the fountain base. |
 |
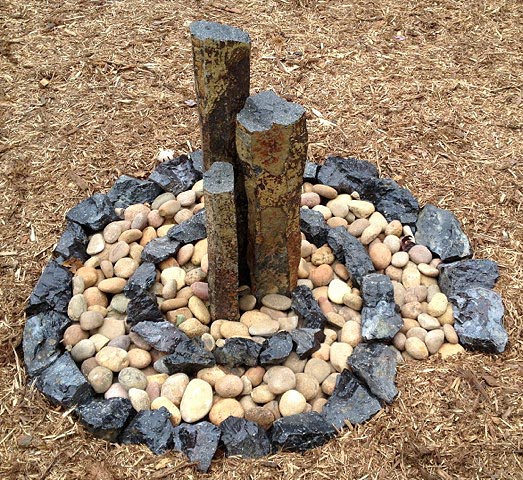
| Here’s the finished fountain, sort of. It was too late in the season to plant the ground cover perennials that will fill the entire mulched area you see contained by the various stone walkways, so that will take place in spring. It isn’t running, because I had already removed the pump for winter. (The pump needs to be stored in a bucket of water, by the way.) The only other structure in this area is the spring blooming and edible fruiting dogwood, Cornus mas, a special request of the homeowners. I used a buff colored beach pebble and created a small spiral out of the highly contrasting stone called Black Ice. Appears to be a quartzite of some kind. I balanced the area with a short edging of larger Black Ice boulders beyond the dogwood, and will probably add some even larger outcroppings of Black Ice to the picture in the spring. |
If this inspires any of you to install a boulder fountain, be sure to e-mail me with questions should any arise during the installation. I’m just sitting here in my underwear, drinking coffee.
Don Engebretson
The Renegade Gardener