RENEGADE GARDENER™
The lone voice of horticultural reason
Fruits of Summer
9-25-06 – In early May this year I began my landscaping season with the usual: plant replacements from last year’s jobs. It’s always such a dreary chore, when one should be upbeat and inspired by the prospect of spending the summer planting fresh and fabulous new perennials, trees, and shrubs in eager homeowner’s yards. But it’s the nature of the business for landscapers in Zones 2 through 5. Southern landscapers deal with winter drought, I suppose, while we deal with winterkill.
 |
| By the middle of June, we broke out the stone saws and started having some fun… |
My winterkill rate is very small, often zero, perhaps because I belong to that pesky one-quarter of the landscaping professionals in my market who always submit soil tests to the University of Minnesota soil lab prior to commencing each job. Then grudgingly, kicking and screaming, I have to spend from one day to a week and from two hundred to two thousand dollars amending the soil and adjusting the pH, based on the size of the job and the results of the test, time and money not showing up in the other guy’s bid.
That sounds like a rather bald-faced, self-serving plug for my landscaping services, but really, it’s not. I think the big reason my winterkill rate is low is that like a lot of landscapers I plead with my clients to water the damn plants after I’ve cashed their check, and give good verbal instructions, written if they want them, on how to maintain the landscape. It’s two and three and five years later that the soil structure and pH adjustments make a difference, a topic (involving some dirty little landscaping secrets) that I’m going to write about in the October update.
By mid-May we were into several smaller foundation renovations, always fun, ripping out great gangly, thinning old yews and ‘Techny’ arborvitaes by plunging the forks of my Bobcat into the soil at their base and seeing if I can not only pop them straight out with one diesel-screeching upward rip, but cause them to do a complete aerial somersault and land upright beside their holes. I’m getting close. Next it’s curve and bump out the beds, eat up some lawn, pop in about twice as many plants as removed, call it a landscape.
Then around the middle of June we were off to Minnetrista, a burgeoning far western suburb of Minneapolis, for the first job we’re going to take a look at. I love tilling the earth and working with fresh, pristine plants, but by this time I was anxious to get stoned.
This was a new home, nice younger couple that had wisely told their builder to forego the poured concrete front entryway pad and sidewalk, because they had been viewing new homes in other neighborhoods and were impressed with the difference between concrete entryways and those fashioned from stone.
 |
| I did the stonework and designed the shapes of the adjoining beds, but did not do the planting design or installation. |
Like an idiot, I forgot to take any “before “ pictures, but here’s the finished product.
Let’s walk through the design considerations. This is not an unreasonable do-it-yourself project, and I know of at least one good book on the subject that teaches all the engineering aspects.
When dealing with any type of sidewalk— concrete, stone, or taconite tailings—that runs from the driveway to the front door, one is typically encountering a step or steps up to the door, and the width of the step(s) is your first consideration.
If your sidewalk is going to be four feet wide, leading to a front stoop with steps six feet wide, you need to bump out the sidewalk width to six feet at the point it contacts the step, otherwise the picture looks stupid. Why are the steps so wide when you can’t access each end from the sidewalk?
So at what point as you approach the steps do you flange out, widen the sidewalk to meet the stair width? There are exceptions, but quite often the answer is to create an entryway pad, or landing, that is as deep as the stairs are wide.
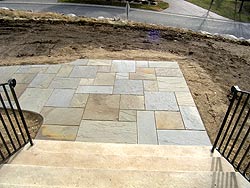 |
| In this installation from several years ago, I made a ten-foot square pad, because the stairs are ten feet wide and the house and yard are large. I know, there are no squares in nature, but sometimes you have to err on the side of formality. The five-foot wide sidewalk widens to about seven feet where it joins the pad (left). |
In this case we have steps that are 10’6” wide, so I made a 10’6” x 10’ 6” pad, measuring off the house, setting stakes and strings, checking that things were square and lines were parallel, then painting the pad into the dirt with contractor’s spray paint.
Your next consideration is where along the driveway to start the sidewalk. If the homeowner (or arriving guests) pulls up to the top of the driveway, parks in front of the closed garage door, and wants to walk to the front door, you want the start of the sidewalk to be right there, easy to access without having to walk more than a few steps closer to the garage, or further back down the driveway. So you want to start the sidewalk somewhere between four and eight feet from the garage door. Four feet is not uncommon, builders often will start it there, very close to the garage door, but remember, that dictates a four-foot wide planting bed off that corner of the garage, not a lot if you want some decent landscaping. So I tend to measure down at least five feet, often six.
In this case, however, the garage thrusts forward from the rest of the house, meaning that as soon as it ends on the sidewalk side, the foundation bed DOES grow quite wide (almost nine feet), so I started the sidewalk 4’6” from the garage, for these reasons and because that looked about right.
I think to speed things up I’ll just run the rest of the photos and use captions to explain the other design considerations, rather than this plodding text. I don’t have it tonight. I’m too preoccupied with my Twins, THE FINEST, TRUEST TEAM IN BASEBALL AND POSSESORS OF THE GREATEST COMEBACK STORY IN MODERN BASEBALL HISTORY, catching Detroit, those dogs, so that we don’t have to face the damn Yankees in the first round of the playoffs.
 |
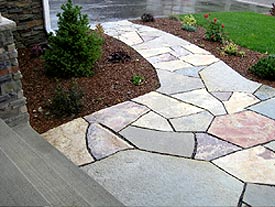 |
| Next consideration, where does the sidewalk meet the pad? After painting out the pad, I laid the sidewalk out using limp ropes, and the whole thing came together when I decided to eliminate the front left corner by merging the sidewalk into that corner. Note also the large pieces of flagstone at the steps—we span the entire 10’6” with just three stones, a huge one in the middle. Where you transition to steps, you want big, solid stones. | Here’s another look at it. Note how the garage juts out (upper left). It wouldn’t make sense to curve the sidewalk so sharply (or make it the world’s stoutest “S”) that it hits the pad square on the side, closer to the house. The sidewalk holds the simple sweep that pedestrians would naturally follow to approach the front door, and that means hitting the pad in the corner. It also maximizes the width of the foundation bed. |
 |
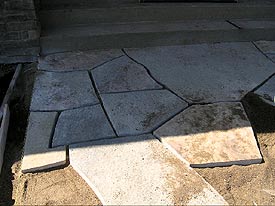 |
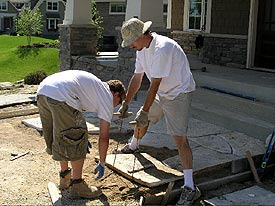
| Renegade Crewsters Ryan and Dave during installation. By this time I’m usually standing around, shooting photos, yelling oblique orders, and drinking Poweraid. Oh yeah, I’m also cutting the stones. | Start at the stoop, and work out to the driveway. That nice “L” piece on the left is what I call a “fancy cut,” a flagstone cut at an inward angle. It’s showing off, but I like them because after a few years they’re pretty easy to do, though there is hand-chisel work involved, and they look so cool. |
 |
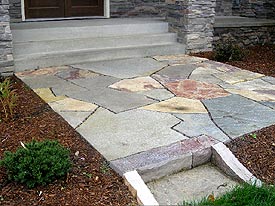 |
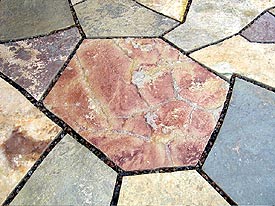
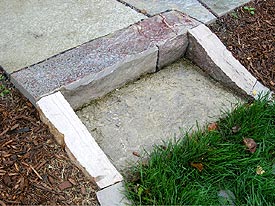
| The stone we are using is Chilton, a nice, moderately priced Wisconsin product that has reds, browns, purples, blues, greens, yellows, and soft whites, though there can be quite a variation in what is shipped week to week from the quarries. I had this nice, large red piece, so used it as a medallion in the center of the pad. Chilton has terrific texture, but that is also its downside: It’s not very flat on top, it curves and rolls and can be quite uneven edge to edge, making the installation more costly because it takes time to make the edges match, and minimize toe-kicks. | So that the homeowners could exit the front door and walk directly out into their front yard, I designed this little egress off the right corner. But the builder had screwed up the grade, not brought the yard up high enough, so I wound up installing a simple step with its own pad (that wound up taking me about a day.) |
 |
|
| Because Chilton wallstone is so curvy and rough, I had to virtually miter the side wall on the right. |
Final thoughts, the sidewalk is four feet wide because that looked right for the job—though the house is good-sized and quite tall, the sidewalk is very short, and a five-foot wide sidewalk would look stumpy. We kept a uniform three-quarter spacing (give or take) between stones because no furniture was involved, and that spacing looks good with large pieces of brutish stone. We filled the spaces between the stones with St. Croix river rock, a nice, faceted small gravel that stays in place during heavy rains, and contains all the same colors as the stone.
Next project: Cute Shorewood Landscape Renovation
Very charming older woman sells her giant old house in Minnetonka Beach, buys a small, easy-to-manage home near the kids, does some updates inside, then decides to renovate the landscaping in front.
Here are the before pictures:
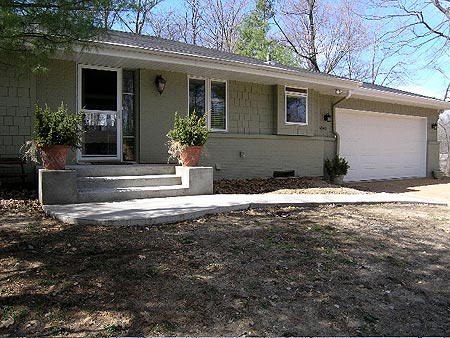
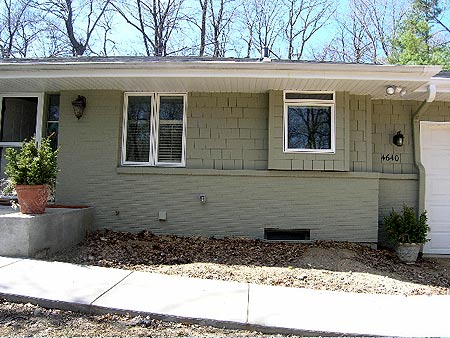
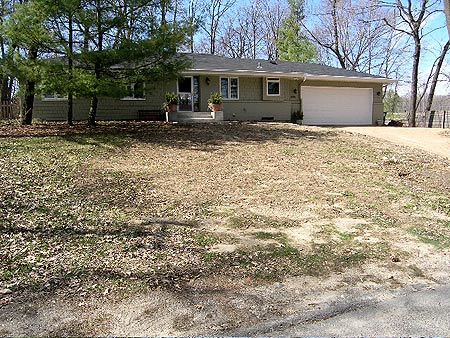
Interesting because the house faced southeast with ample trees from the neighbor, plus the two big white pines just off the front left off the house, meaning the front yard received pretty close to full sun, but not the foundation planting. At about three in the afternoon the left side of the sidewalk (yard side) was in sun, the right (house side) in shade.
 |
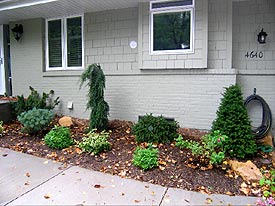 |
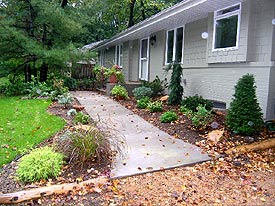
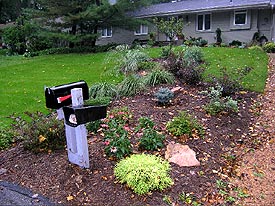
| The old landscaping had grass running straight up to the sidewalk along the left side, of course, but that’s the sunny side, so it called for a bed. Now, when you walk to the front door, you have landscaping on both sides of you, instead of just on your right. | The evergreen anchors I used were (l-r), Taxus cuspidata ‘Dwarf Bright Gold’ (dwarf golden yew), Pinus strobus ‘Blue Shag’ (dwarf white pine). Tsuga canadensis ‘Pendula’ (weeping hemlock), Picea abies ‘Pumila’ (dwarf Norway spruce) and good ol’ Taxus cuspidata ‘Capitata’ (Japanese upright yew). Also used rugosa shrub roses that perform well in half-day sun, and Canadale Gold euonymus. |
 |
 |
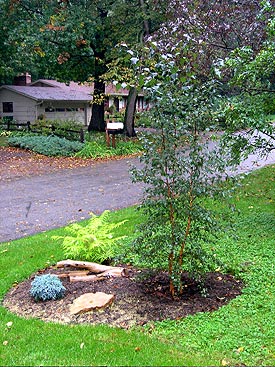
| Client wanted a flowering crab in her front yard, so I planted a cute little Candymint (mature 10’ H by 15’ W, pink blooms), then wove a wide bed down from the tree to the street and alongside the driveway. I mean, her kids are fifty, they don’t need a grass lawn. It had poured just before I shot the photos, and some of the upper grasses are flopping, but sunlight pops them back up | Top to bottom, Physocarpus opulifolius ‘Monlo’ (Diabolo ninebark), Panicum amarum ‘Dewey Blue’ (switch grass), Juniperus squamata ‘Blue Star’ (blue star juniper) |
 |
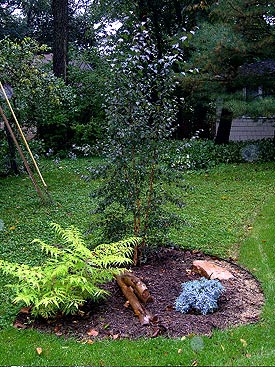 |
| Front left of the yard had nothing but weedy grass, so to give some sense of a bookend I made this little island bed, featuring Betula szechuanica ‘Royal Frost’ (birch), Rhus typhina ‘Biltiger’ (Tiger Eyes sumac) and Juniperus squamata ‘Blue Star’ (Blue Star juniper) Always do something in your corners, front yard and back | The client had an old cedar felled, and my man Dave stripped it, thinking it might come in handy. It did—that’s the end of it there, serving as a bit of natural sculpture along the floor of the bed |
 |
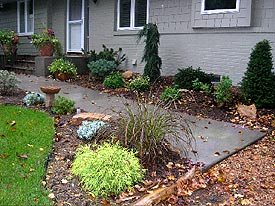
Left, the rest of the log I cut into two pieces to serve as retaining walls between the sloping beds and the driveway. Always save cedar logs! These will last at least twenty years. So the main tip is, with sidewalks, run a bed on both sides, and curve the outside bed out as it hits the drive, to give a feeling of grand entrance. (Above) It works regardless of size of home. |
OK, that’s enough for now, it’s late, it’s September 23rd, I promised these would be up by the 24th (or so!) and I’m working tomorrow (Sunday). So give me a week and I’ll add the third job, and also add a new Top Pick, Plant Spotlight, Don’t DO That, and Myth of the Week.
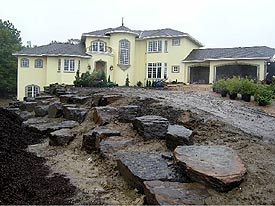 So I leave you with two final photos. This one above, of the job I’m doing right now, is the subject of the October update (and the reason I’m working weekends). So I leave you with two final photos. This one above, of the job I’m doing right now, is the subject of the October update (and the reason I’m working weekends).
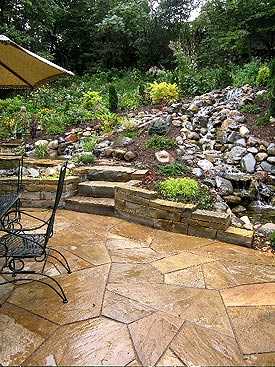
The other is a teaser of the patio, pond and waterfall job we did in August and that I’ll detail next week. |
 |
Don Engebretson
The Renegade Gardener