RENEGADE GARDENER™
The lone voice of horticultural reason
Crafting Cool and Creative Containers
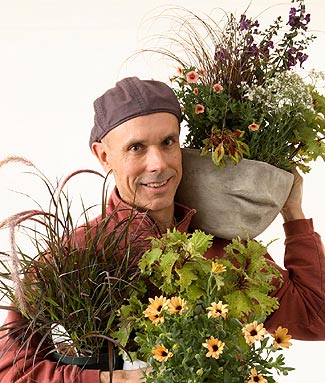 I BLEW IT. I gardened for six years before it occurred to me to grow plants in containers. I was a man, damn it, and grew my plants in the ground, where they belonged. I wasn’t going to fool around growing pansies in a pot. But then…
I began to visit arboreta and fine public gardens, good gardener’s properties, and started closely studying photos of evocative residential landscapes in garden magazines. It became obvious that the really fabulous views, the dazzling scenes, the greatest shots, were made even more spectacular by the ample use of cool containers filled with flashy, creative plant arrangements.
Easy to do? Hell no. Once I finally began making my own, I was ten years in the woods creating crap before I started figuring anything out. Now, sure, in a pinch I could knock out a serviceable corsage and boutonniere set from kitchen compost scraps, but like so much of gardening, it’s a relatively simple skill that takes some time to hone.
So tag along. This is a brand new article with plenty of pictures that will fast-forward you through at least ten years of the container gardening learning curve, while explaining the key design secrets to creating beautiful container arrangements.
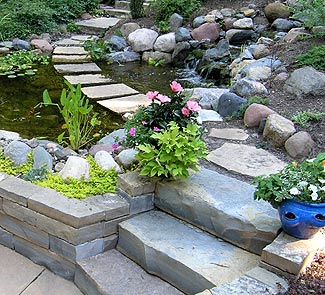 I think of containers as the throw pillows of exterior design, essential for splashing color and form across decks, patios, sidewalks, and other hardscape areas where you can’t dig up the dirt and plant. But don’t use containers only up close to the house; fling them gaily across the entire landscape.
Use a large single container to mark the entrance to a pathway, place a pot of blooming annuals on a pedestal so that it erupts from the middle of the perennial garden (or tree and shrub border), arrange bowls of impatiens and coleus to brighten up shady stretches under the old oak tree in that dark corner of the back yard.
I’ve become, of course, an absolute container junky, and by this I mean the containers themselves. I can’t resist the seductive come-on of any sleek, stylish, cute or kitschy container I spy that winks and says, “You need me.” Sometimes my ex-wife would catch me surreptitiously slipping some vaguely expensive, antique iron urn into the garage or basement, and would (fairly, I realize now) cry out, “How could you buy another container? You have forty in the basement you don’t even use anymore!” To which I could only reply, “I know, but honey, none of them look this one…”
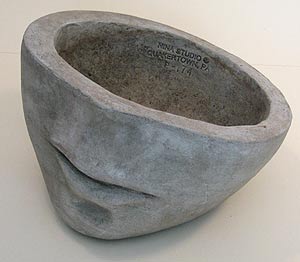
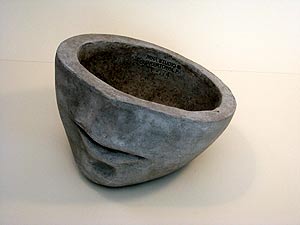
I was in a Wisconsin nursery fifteen years ago or so when this concrete container said to me, “Hey, come here.”
Arranging plants within containers so that the result is fabulous is a skill anyone can learn. The principles involved are not rocket science. You are perfectly capable of creating container arrangements that will soar, sizzle and seduce equally to the best pre-made container arrangements you can purchase at a hip nursery, or pay a professional to create on your property. I am ultimately qualified to explain these principles to you, having never had a lesson.
So here goes—all the important stuff you need to know about crafting cool and creative containers, most of which I’ve never seen mentioned in magazine articles or books.
Types of Containers
Plastic — Fake terra cotta, plastic pots, like the ones you used to see at nursery centers, sporting a thin, reedy spike plant surrounded by five red geraniums, are considered sacrilege by many, but plastic has its place. In full sun, plastic pots will retain moisture better than clay pots, and soil in the container won’t heat up and stay warm overnight as it will in containers of iron or concrete, thus helping plants survive longer into the season. They are among the most inexpensive, and come in bold colors and sleek shapes. Watch out for smaller plastic containers in storms and strong wind, however, where they can easily blow over. Plastic pots don’t belong on deck railings.
Fiberglass — Pretty much the same read as Plastic, above, although the better fiberglass containers can easily pass as antique painted wood, concrete or clay.
Concrete — Used to hate ‘em, now I love ‘em. Manufacturers have improved the look and created many intriguing shapes and muted colors. As with iron containers, they’re heavy, so they don’t budge in thunderstorms, even if the plants in them wind up floating down the driveway. But they get plenty warm in full sun (as does iron), and carry that heat well into night, creating warm soil that leads to mid-season plant decline. In full sun, water concrete and iron containers in early afternoon, if possible, and hose down the outside of the container at the same time. High quality concrete containers withstand the coldest winters without cracking or flaking.
Iron — Rugged, heavy and often ornate, iron containers have a grand look all their own. Rusted antique iron containers are always a wise purchase if you find the style (square, round, bowl, bowl-on-pedestal) to your liking. Older cast iron containers often do not have a drainage hole, simply remedied by steel drill bits, or by creating your planting arrangement in a suitably sized plastic container that you slip inside. Iron is good in climates where you get freezing temperatures in winter and like to do winter arrangements, as you needn’t worry about deterioration.
Glazed Pottery — An excellent choice for anywhere, glazed clay pots retain moisture well and come in rich glossy colors as well as soft, muted color blends. These are clay pots that are glazed and then fired in a kiln. For moisture retention and overall durability, select containers that are glazed both inside and out, or painted on the inside with a dark sealer material.
Wood — Naturally one thinks of window boxes, but you will occasionally come across well-crafted wooden troughs, bowls and containers. Most often made of cedar, they may be natural, stained, or painted. In any case, if you love it and wish it to last more than a decade, create your arrangement in a plastic container that you slip inside.
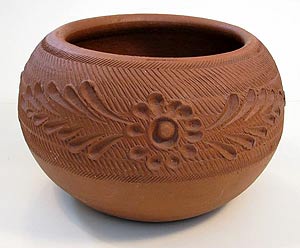 Terra Cotta — To my eye, terra cotta (Italian: “baked earth”) containers are supreme. The iron typically found in clay—from Italy to Indiana—gives the material a natural color, from rusty red to orangish red to brownish orange, that serves as the perfect foil for foliage and flowers of any color. It has been used as a building material (bricks, roofing) and for construction of containers for at least 2,000 years. Then as now, the clay may be pressed into molds or spun by hand, then baked in kilns (or in the earliest days, baked in the sun). Stoneware is clay that has been baked longer and at higher temperatures, making it stronger than terra cotta. When flicked with a fingernail, a terra cotta pot will give off a short, dull ring. It’s a good test for at the nursery—if it doesn’t ring, there’s a hairline crack somewhere.
Before use, a new terra cotta pot should be immersed in water for at least thirty minutes. I soak my new, small to medium pots in a five-gallon pail of water. If you bring home a pot that’s larger, fill a plastic garbage can. For a very large terra cotta pot, place it in shade and hose it down heartily, inside and out, four times within the course of an hour.
This is necessary because terra cotta is porous. If you pot one up straight home from the nursery, as you water the container the dry, brittle terra cotta will draw much of the moisture right out of the soil and into the clay. Fertilizers and trace elements from soil can lead to whitish discoloration, which can lead to chipping, flaking, and early deterioration. At season’s end, terra cotta containers should be emptied, washed thoroughly, and placed in a sunny spot to dry for several hours. Store them where they will not freeze. In spring, repeat the soaking process. Terra cotta containers should not be exposed to winter elements in USDA Zones 2-7.
Placing Containers
 |
| One is good … |
 |
| Two looks bad … |
 |
| Three makes it good again. |
When it comes to placing containers in the landscape, one container, all by itself, always looks great. You might place a single container in a corner of the deck, or a small single pot on the center of the patio table. Place a second container with the first, to create a double, and I don’t care where the two containers reside, or if they match, don’t match, or are different sizes, for some reason they don’t look as good. Something is missing. What’s missing is the third container.
Now add a fourth container. While the eye doesn’t look away in disgust, there’s something odd about that even number of pots. Now add a fifth. There, that’s better. So that’s a rule: For some reason, an odd number of containers, one, three, five, seven, makes a more attractive grouping than even numbers of containers. No one knows why. A psychologist will tell you that the brain finds things in thirds more pleasant, and an architect will babble on about the Golden Mean and where the Greeks placed their pillars and horizontal lines in the Parthenon, but still, what I mean is, no one knows why.
After about seven, if you have a giant space to fill, or want to line pots in a single row along the edge of something, you can go with eight or ten or whatever, and there become too many for the eye and brain to figure out, so the even number looks fine.
I was speaking in Virginia and a woman expressed concern that all these years she had been using two large, identical containers, placing one on each side of the front door to her brick colonial house. I asked her what year the house was built, she said 1970, and I told her I wasn’t aware Virginia had been colonized as recently as 1970. That’s a Dame Edna joke. Seriously, when I asked her how she thought they looked, she said fine, and I explained they were indeed fine because what she had created was two singles. A double is two containers next to each other. She could do matching arrangements of three containers on each side of the door, and they would look fine. That’s not a six.
Potting Up
Anything you use as a container must have a drainage hole or holes. Excess water needs to drain readily from the soil or plants will be prone to root rot. Containers designed for container gardening will always have a hole in the bottom, often quite large. Sometimes you find a nice container at a nursery that doesn’t have a hole, it might be plastic or metal or glazed pottery, and those are meant to be sleeves—you create your arrangement in a container that does have a hole, and slip it inside. The black plastic pots that perennials and shrubs come in are great for this, because if the diameter is right but the black plastic shows over the top, you can slice it to proper height with a knife.
Remove the inner container when watering, wait for the water to stop dripping from the drainage hole, then slip it back into the outer container. Yes, you can place some gravel or three small blocks of wood on the bottom of the outer container, to elevate the inner a few inches, but after a few waterings (or a heavy rainfall) the outer container will start filling up with water and you need to remove the inside container to dump out the sleeve.
A much easier path is to pot up a proper container, one with a drainage hole. However, you need to cover this hole with something, or the soil in the container will slowly seep out with the water over the coarse of the season. Raise your hand if you’ve ever read the tip that you can take broken shards of an old clay pot and place them in the bottom of your container, to cover the hole. Every hand up? Good.
Do you know where this classic piece of advice came from? The 1600s. This was what you did before the advent of porous landscape fabric, and coffee filters. Lord, how I love garden writers. Some garden writer somewhere is assigned to write the eight-millionth magazine article on the topic of container gardening, and is guaranteed to toss in every easy tip and tactic he or she has read on the topic over the past twenty years. The broken shard tip is sure to be included. Garden writers have passed down that extinct tidbit for twelve generations. And I should know—I used it once, in a published newspaper column. Beats doing research.
A patch of landscape fabric or a double layer of coffee filters will suffice. Next comes the soil.
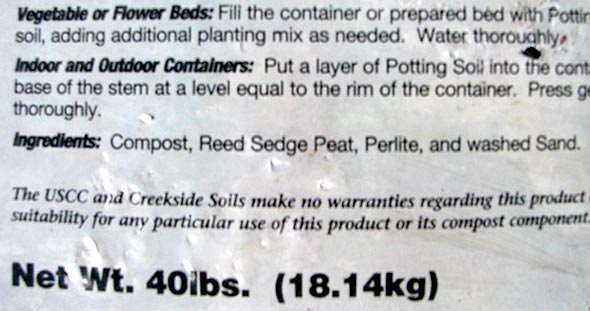
Here is where the gardening industry has done us all a great favor. At the nursery, ask for and purchase soil-less potting soil. It will probably still say “potting soil” on the bag, but if you check the ingredients on the back it will include things like sphagnum peat moss, composted pine bark, perlite, horticultural lime, perhaps sand. It’s all organic, it just doesn’t include any mineral soil.
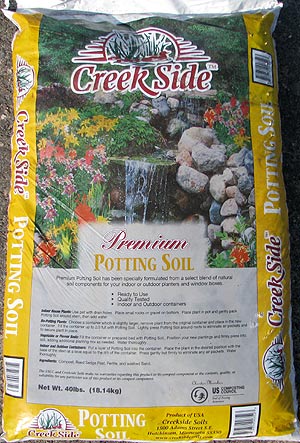 |
The black mineral soil that used to be sold as potting soil, the stuff your mother used to grow her African daisies, is not a very good container medium. It doesn’t retain moisture much, it’s heavy, and it doesn’t drain very well. The new, soil-less mixes are lighter, so that the fine roots of annuals penetrate easily and create healthier plants. These mixes retain ample moisture, but are designed so that excess moisture drains out quickly, maintaining a good balance of water and oxygen. Sometimes they contain a slow-release granular fertilizer, which I prefer, but we’ll cover fertilization in just a bit.
During my early forays into container gardening, I would begin by adding soil to near the top of the container, meaning I had to scoop a bit out (and toss it into the next container in line) while I placed each of the plants. Finishing the arrangement, I’d want to get it watered quickly so it could make its grand debut out in some perfect spot in my yard somewhere. Watering wand in hand, I’d add water—for about two seconds, then have to draw the wand away as the water hit the soil and almost immediately ran over the sides, taking some of the soil with it.
Count to ten, squeeze the handle on the wand, two seconds, water running down the side, stop, count to ten, repeat. After five minutes, I’d have water soaking down perhaps one-quarter of the way into the soil in the container. By the third year, I said this is nonsense, there has to be a better way.
You see, potting soils out of the bag are quite dry, especially the new soil-less mixes. And peat moss needs to get going a little bit before it begins to draw water. Waiting to water until the end was the flaw. So now I fill a small (ten-inch) container with the potting mixture only to within three inches of the top, perhaps only four inches to the top of medium and large containers. Don’t add any plants. Now, water the container with your wand, fill it up, up, up, until the water is just below the edge, then stop. Whoosh, the water activates the soil and is drawn down halfway into the container. Hit it a second or third time, depending on the size of the container, and you’ll see water coming out of the drainage hole.
 |
| Everything but dirt |
Now you’re ready to add the plants, and discover you have a nice flat floor of moistened soil three, four or five inches below the lip of the container. You may need to add a little soil here, or dig a little out there, but you can pretty much just place the root balls of the plants right on top of the soil. Add one, then the next, then another, and just fill in between the plants with soil from the bag. Tamp this soil in between the plants with your fingers.
How wide do you space plants in containers? Depends on a million things. The type of plants, size of plants purchased, size that plants grow, size of containers, sunny or shady, whether the Twins are having a good spring or not. In general you are ramming plants together much tighter than regular garden spacing. It’s wise to buy small annuals in their earliest size for sale, because these can be spaced four to five inches apart. Buy the same plants in four-inch pots and you’d need to ram them root ball to root ball. Annuals spaced six inches apart and grown in containers set out in full sun could look bedraggled and ready to give up heading into August, while those rammed root ball to root ball in a container in the shade look great heading into fall.
I can’t describe every little nook and twist, you learn, you figure stuff out, I could go into the minutiae right now but then you’re staring at your computer screen reading War and Peace.
It’s a lot like landscaping—you need to get used to looking at various small plants, and being able to tell what they’re going to look like on the 4th of July. The plant tags will tell you height and width, and sometimes be way off, but what you should be noting and remembering are the various forms and habits of the plants you favor.
 |
| How wide do you space plants? Whatever creates this. |
But unlike landscaping, you can prune and hack and pinch and shear any plant you want at any time, if something takes off or takes over or you want to cut one half of something out of the picture so that something you planted too close can be seen, do it. I personally plant things quite tight. Using annuals and perennials in 4” pots as our standard, I have no problem planting five to seven plants in a fourteen-inch diameter container, though that would include plants that don’t get real wide, and at least one trailer.
Remember, if you create a container and a month later you wish you had added more plants, yank stuff out, plant it back tighter, add more plants. If you added too many, pull things out and use them in something else. These are plants growing in the greatest soil they’ve ever know, keep the plants watered and you’re never going to kill anything.
You’ll want a finished container to have a half- to one-inch lip between the rim of the container and the soil. If a plant near the edge is riding a little high, push the root ball down, hard if you have to, to achieve this. When completed, give it your two-second watering, wipe the edge of the container with a damp cloth if you did get a little soil over the side, and your container is ready to go.
Plant/Container Scale
 A single plant in a single pot always looks great, provided the plant grows up and provides adequate scale to the pot/container. So read your plant tags to learn mature height and width, then understand what I call container visual weight (CVW) versus plant visual weight (PVW). If your container is fourteen inches tall, you need a plant or plant arrangement in it that will grow at least fourteen inches tall, and this assumes that the plant or plants are going to grow out wider than the diameter of the container. (And there’s nothing magic about fourteen inches. If the container is three feet tall, you need plants that will grow at least three feet tall.)
There are exceptions to every rule. But most often you need a CVW to PVW ratio of at least 5:6.
And even 5:6 can be dicey. Plant a white-blooming, airy annual such as gypsophila (baby’s breath) in a fourteen-inch tall, terra cotta pot, and even if the plant grows fourteen inches tall and billows wider than the container, it’s not going to carry enough visual weight to offset the visual weight of the container. It will look container-heavy. A worst-case scenario is when a new gardener fills a large, two-foot tall container with geraniums or impatiens that only grow a foot tall. It never looks right. Too much CVW.
 |
| An arrangement I did during the Eugene show. Plants will grow two times taller. |
“Trailers,” plants such as ivies, potato vine, vinca vine, and the like, come into play here. Useful because they spill over the sides and create contrast with the container, they also add PVW. Using trailers, you can actually bring the overall height of the arrangement down. A CVW to PVW of 5:6 might not look great with the plants you’ve chosen, but looks fine if you start over and use trailers. You’re not only adding PVW, you are cutting down on the CVW.
If you want to play it safe, use a CVW to PVW ratio of 1:2—one-third container, two-thirds plants. If your container is twenty inches tall, plant something in the arrangement that will grow forty inches tall. You can still do the one plant, one container thing. Grow a single clump of a perennial grass such as Molinia Skyracer, which will hit six feet, in a vase-shaped, two-foot tall glazed container, and tell me how it looks. You don’t have to. It looks fabulous.
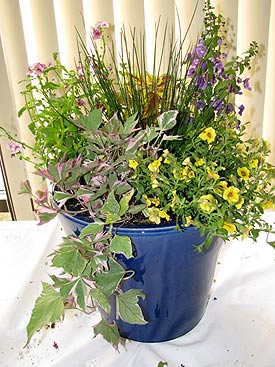
Once your container diameter approaches ten inches, you can begin planting multiple plants. As with numbers of containers, plant using odd numbers of plants. Two different plants in one container will look funny. What’s missing is the third plant. Three of the same plant will always look fine—they grow to appear as one plant.
Planting Design
 |
| An arrangement I did on stage in St. Louis. |
I’ve already referenced the famed, green-spike-plant-surrounded-by-five-red-geraniums concoction that some people at some time apparently thought was a dazzling arrangement, but even twenty years ago, when that was the standard (at least in the Midwest) I knew I could do better than that. Well, I could, though as I soon realized, not much better.
As with all beginners, I thought that the whole point of container gardening was to create soaring spectacles of flowers. So of course, I grew nothing but annuals. Now, blooming annuals always have been and always will be great plants for containers, and yes, flower color is a large part of the equation, but still I led myself down a decade-long road littered with fairly pedestrian container arrangements.
 |
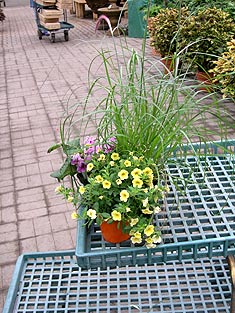
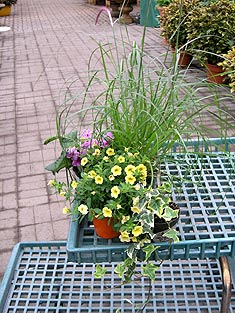
| I pick out and build contrasting plant arrangements in my cart while I shop the nursery. |
 |
 |
 |
 |
For a ten-inch pot (I’m referring to diameter across the top) I’d buy three different, blooming annuals, let’s say a blue salvia, a pink angelonia, and a white osteospurmum (African daisy). OK, so in bloom, the colors were nice, I even had contrast in bloom form, but why didn’t it look very creative?
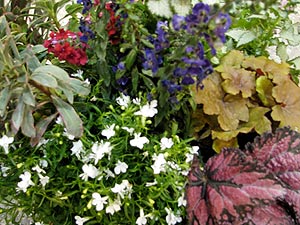
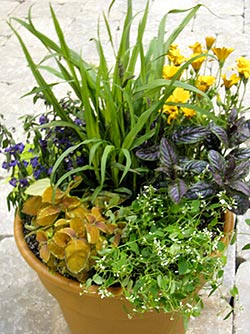
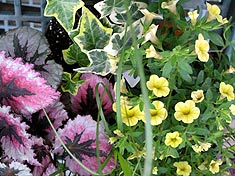
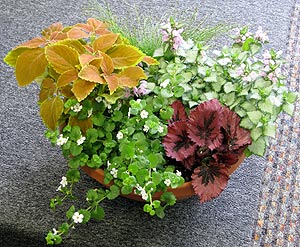
As I studied other people’s containers and looked at pictures in magazines, I realized that the most attractive containers nearly always had something neat going on with the foliage. Most annuals have rather nondescript, small leaves, very often sharing the same, plain green color. I had been suckered into that bloom-color thing, when the secret to placing plants next to each other has everything to do with striking contrast between plant foliage and form.
When you create containers, try making every third plant a foliage plant. Annuals such as coleus, strobilanthes (Persian shield), and hypoestes (polka dot plant) and of course the essential Rex begonias get moved to the A-list because of their strong foliage. These plants don’t even flower, except for coleus, the flower spikes of which you should pinch off as they appear, so that plants will continue to grow their fabulous, colorful leaves.
Annuals that combine both attractive flowers with good foliage (there are a few, let me think…New Guinea impatiens, lantana, variegated geranium, heliotrope, nasturtium) perform nice double-duty.
You’ll find even wider foliage selection when you start including perennials in your containers. Heuchera (coral bells), euphorbia (also an annual), lamium (dead nettle, a great trailer), ferns (particularly Japanese painted) and perovskia (Russian sage) are all terrific additions to container arrangements. In the fall, rip them out and plant them in the garden. Water them in, then reuse them (or divisions) in containers the next year.
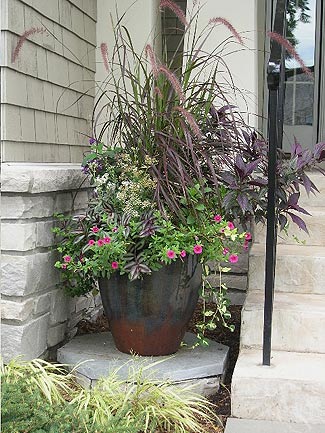
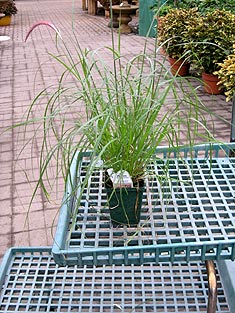
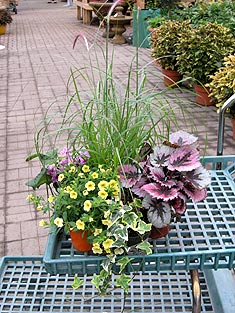
Then there are the grasses. Gone are the shallow days of those wimpy little spike plants. Grasses—both annual and perennial—are great for placing in the center of larger containers. And of late there are smaller, tufted grasses (check out Carex nigra, black sedge grass) you will find in nurseries that exist to be used in containers.
Did I say center of containers? Another design tip, if a large container is to be placed against a wall, or in a corner, or any placement where it is only viewed from one side, mess around with treating it like a mini-garden bed. Plant the tallest plants to the rear, mid-sized plants in the middle, and shortest plants in front, polishing it off with a trailer or three. Grasses or tallest plants need not go in the center.
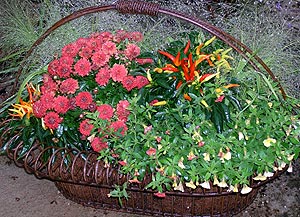
And who said one must use only plant material? I have beautiful driftwood pieces that, depending on size, I use as centerpieces, accents, and even trailers in containers. Small sculpture, model buildings, figures, and ornate stone pieces are just a few more items I have used or see used in creative containers.
Key to it all is to play fast and loose and develop your style. That “make every third plant a foliage plant” thing I said earlier? That was my motto when I first started getting the hang of it, but I’ve created containers where one in seven or two in ten plants in a container were strong foliage plants, the rest were all colorful flowers, and it worked. I don’t want you to memorize rules. The important concept to remember is that contrast in foliage shape, size, color and texture, combined with contrast in plant form, are your goals. To whatever degree you think looks cool.
Maintenance
Never let your containers dry out. Water when soil in the container is dry when you scratch down about a half-inch. Containers in full sun may well need watering every day, so you’d better hire the neighborhood kid if you are going on vacation—or out of town for 24 hours. Those water-retaining gels that are so highly advertised have been proven to not do much, or at the very least, can’t be trusted, so don’t bother.
 One thing you can do to keep containers growing in full sun from becoming beaten down by mid-summer is create four or five of containers, then rotate them. A container full of full-sun plants can spend two days in full sun, then three in part sun (or a couple in shade) and do just fine. Plus, your friends and neighbors will be stupefied that you can have this gorgeous container full of sun-loving plants that appears to be thriving in a shady corner of your patio. What a gardener.
If your potting soil contains slow-release fertilizer, all you do is water as needed. As with all watering, use a wand, keep the pressure low, and water the soil, not the foliage. Watering in the morning is best, with the exception of iron or concrete containers that remain in full sun, where I mentioned watering midday so you can also cool down the container during the hottest part of the day.
 |
| A sun/part shade bowl I created in Eugene. |
Remember that the slow-release fertilizer is usually gone after four months, so at some point you need to fertilize additionally. Water-soluble fertilizers are fine, use brands such as Peters or Proven Winners, that include not only nitrogen, phosphorus and potassium (N-P-K) but a half dozen or more micronutrients, iron, magnesium, copper, zinc, etc. If your potting soil contains no fertilizer, water every two weeks with one of the brands above, mixed full strength, or use a very weak solution every or every other day.
Deadheading the flowering plants in your containers, particularly the annuals, is key to keeping your container arrangements looking good for as long as possible. Once a week, go over each container and pinch off all faded and drooping flowers. You use your thumb and forefinger, and pinch down to a full set of leaves. This will postpone the plants from going to seed, and they will instead continue to produce flowers (the annuals, anyway).
If you are retired, you may do this anytime on a Saturday or a Sunday. If you work, you must do it early in the morning, once a week, on a Monday through Friday.
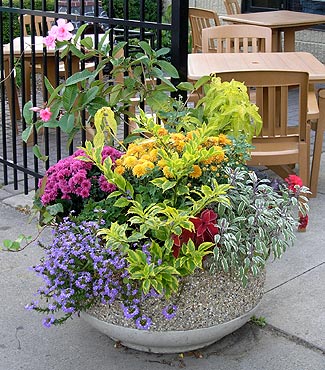 |
| A nice late season container at my local coffee shop. Bloom color, yes, but foliage plants seal the deal. |
Get up a little early. Grab your first cup of coffee, and while the sunlight is breaking, the birds are beginning to sing, the bees are waking up, and the first butterflies of the day are taking wing, spend half an hour grooming your containers. If something is growing a little too heartily or making the container look lopsided, trim it back with your bypass pruner, then follow up with pinching the remaining plants.
You forget about everything in the world, you forget where you are, you become completely involved with primping and grooming this lovely celebration of nature that you created. This is not work, this is not maintenance, this is gardening. Go inside, take a shower, then head to work, where on that day you will be a better employee, a better boss, you will write better ad copy, you will design better software, or you will sell more shoes, for whatever it is you do, you will do it with glowing, peaceful gladness in your heart.
Don Engebretson
The Renegade Gardener