RENEGADE GARDENER™
The lone voice of horticultural reason
Installing a Stepping Stone Path

Incorporating the permanent beauty of natural stone into your landscape is a sure-fire way to elevate it to new levels of distinction.
Unfortunately for most homeowners, major stone projects such as flagstone patios, boulder walls, outcroppings or large ponds and waterfalls are more than they can engineer and literally handle. These projects are best achieved by hiring a professional landscape firm.
However, one of the most popular, attractive and functional landscape features using natural stone is one that homeowners are quite capable of designing and installing themselves: stepping stone paths.
Designing the Path
Stepping stone paths look great regardless of length. In fact, a short, curving pathway of only three to ten stones—perhaps a shortcut from the front door stoop through a narrow garden bed – is a terrific addition that combines functionality and focal point. To start, grab a tape measure, measure the distance of the proposed path, and shoot a picture of the area with your phone while visualizing the curve.
Then head to your nearest stone supplier and ask to see their selection of “steppers.” Steppers are small pieces of irregular-shaped flagstone in the twelve- to twenty-four-inch diameter range, light enough for one person to handle. They come in a wide variety of stone types and colors, ranging from one- to three-inches thick.
A Neat Trick
The stone yard will have open pallets of the various steppers they sell. Here’s the secret: After selecting your stone type, lay out your pathway in an open area beside the pallet. You have your length measurement, your tape measure, and your phone photo. Let’s say the distance is nine feet, and it curves a bit to the left. Select a nice large stepper and place it on the ground as the first stepper.
Now, sorting through the open pallet, select a second stepper that matches the angle of the end of the first stepper. Then find your third stepper. You want to (roughly) match the angle of the end of each stepper with the next, plus keep a roughly uniform width to the path. (Well, sort of. You want your first stepper to be large, then start narrowing the path, ending it at another larger stepper). This is easy when you have an open pallet of steppers to sort through.
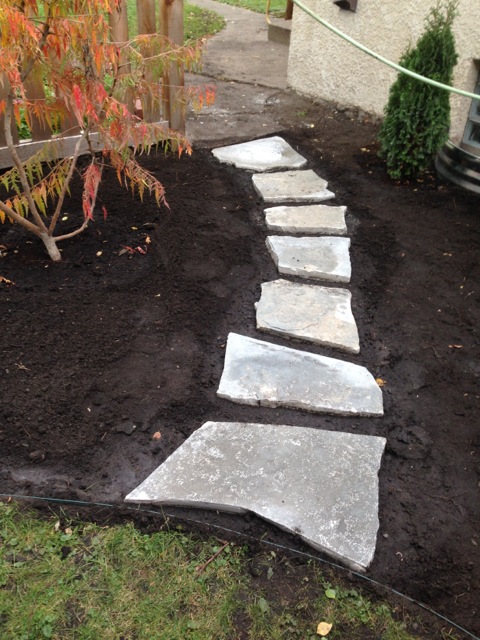
I laid this pathway out exactly as described in this article, no cutting, no breaking.
Space the steppers about two to four inches apart, and whichever you choose, keep the spacing consistent. Measure your progress and check your length with your tape measure, check your photo to approximate the curve, and finish your path with a second, slightly larger stone. Now, you pay for and take home only the exact number of steppers you need. Stack them in order on your trailer or in the bed of the pickup, or number them with chalk. Be sure to tidy up and put the unused steppers back on the pallet!
Installing Steppers
On site, lay out your path on the ground. Adjust the steppers to find your curve and adjust your spacing until the pathway is exactly the proper length. Using a straight edge shovel, outline each stone by dragging the corner of the shovel around its entire perimeter. Remove the stone and you’ll see its outline in the soil. Excavate the soil under each stone to a distance of half the stone thickness—usually about an inch.
If you are installing your stepping stone path across an expanse of lawn, slice straight down into the lawn with a straight edge shovel to a depth of about three inches, all around the perimeter of each stone. Remove the stone, then slice up the stone-shaped piece of turf by working the shovel horizontally.
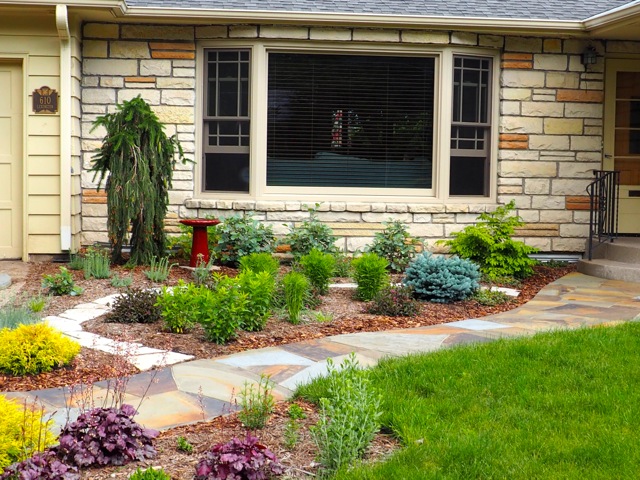
The stepping stone path branching off from the sidewalk to the left, then returning to the sidewalk near the front door, also was done without cutting any stone. We did have an entire pallet of stone to choose from, however, since we also needed ample steppers for our next job.
Have a bucket of coarse sand with you, and a large rubber hammer. Spread a thin layer of sand in the excavation, place the stepper back, and tap it firmly with the rubber hammer. Do NOT smack each stepper hard; a rubber hammer blow can break a stepper in two. Stand up and check each stepper by placing the toe of your foot with a bit of weight on each corner of the stepper. You’ll usually see a little movement. Remove the stepper and add more sand where it’s needed to stabilize the stepper.
The top of each stepper will be slightly higher than the ground, by an inch or so, but that will disappear when you add mulch around the path. Plus they’ll settle just a bit over time. If installing the steppers in lawn, drop them down a little deeper, so that the surface of each stone is level with the ground. Then you can mow right over the path.
Longer Pathways
If the stepping stone path is lengthy, perhaps winding and weaving through your lovely perennial garden, or if creating a long woodland pathway, you’ll need to bite the bullet and order a partial or full pallet of steppers (or more) and have them delivered by the stone supplier. Talk to them about the length and desired width of the pathway, and they will compute the approximate amount of stone (in tons) that your project requires.
Now the process is the same as described above. Select a large stepper as your first stone, then find one that fits nicely off it, etc. After the path is laid out, install as above.
But fair warning: Working with steppers, getting the angle on this one to match the angle of that one, keeping a fairly uniform width, fitting them into a lovely, unique path, is captivating, soothing and ultimately gratifying. Just like everything else when we garden.
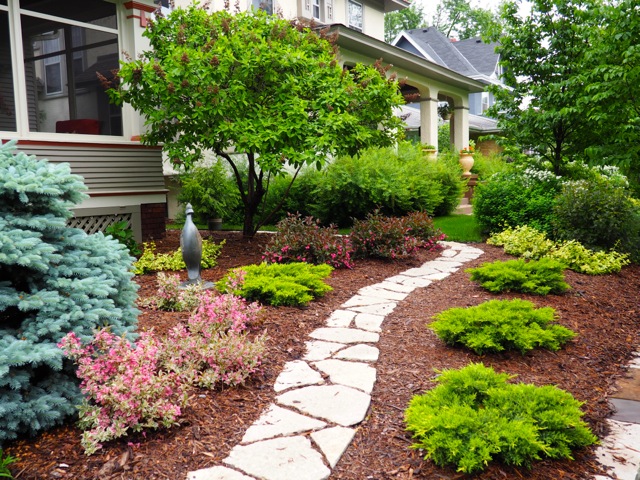
OK, this one I cheated. I fit the stones together as tight and best I could, but when I couldn’t get a tight fit, or maintain a uniform width, I cut a tip or shaved a side of the steppers here and there with a stone saw.
Don Engebretson
The Renegade Gardener