RENEGADE GARDENER™
The lone voice of horticultural reason
Strong Bones: Design Tips for Hardscapes
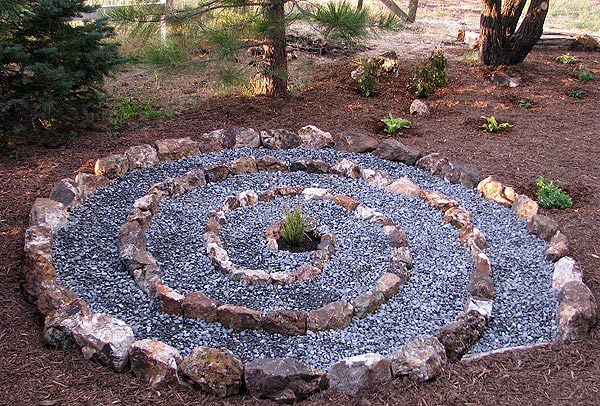 |
| Meditative stone spiral by Don Engebretson, Sierra Valley, California. |
A garden is not a landscape, though some think the words interchangeable. A garden contains plants, as in perennial garden, vegetable garden, conifer garden, or decorative shrub border. A landscape contains plants arranged in gardens plus hardscapes – patios, sidewalks, walls, boulder outcroppings, garden edging, to name the most prevalent – and it is these hardscapes that combine with gardens to create a beautiful, functional landscape around your home.
CONCRETE OR NATURAL STONE?
Knowing where to place hardscape features is as much a part of landscape design as placing plants, but first you must decide if the material to be used for major hardscape features will be concrete or stone. Both have advantages and disadvantages.
Concrete pavers now come in different sizes, shapes and color blends, in addition to being tumbled, all of which combine to approximate the look of either brick or natural paving stones. If you want a sidewalk or patio that’s easiest for a homeowner to install, uniformly smooth, easy to sweep in summer and shovel in winter, concrete pavers fill the bill.
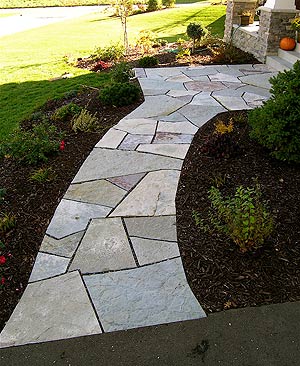 |
| There are very smooth flagstone products available, but if doing it yourself, concrete pavers will lay quicker. |
However, most will agree that a concrete paver patio or sidewalk will not equal the charm and beauty of the same hardscape feature constructed from natural stone. This holds true for retaining walls.
Concrete retaining wall systems have advanced to the point that the blocks more closely resemble natural stone, up to a point. You can always tell a concrete retaining wall from a block away, whereas a stonewall will captivate from two blocks.
Further, there are no concrete product alternatives for attempting to mimic a small fieldstone, boulder, or quarried wallstone wall. A retaining wall constructed from carefully fitted small fieldstones, larger boulders, or true wallstone will always possess a more natural beauty than a concrete retaining wall, and evoke a more powerful air of craftsmanship and permanence.
|
Cost usually favors concrete. If hiring a landscaper, concrete paver surfaces will be bid at between one-third to one-half the cost of flagstone. For retaining walls, a boulder wall will be bid at a price comparable to concrete retaining wall block. However, a quarried wallstone retaining wall will cost around twice as much as the same wall constructed from concrete. If budget poses a problem, concrete hardscape products are the answer. Longevity favors stone. When properly installed, a stone patio, sidewalk or wall should remain functional and look good at least seven times longer than the same hardscape constructed from concrete – two hundred or more years versus thirty. Heat in summer, cool temperatures in winter, and ever-present moisture cause concrete to deteriorate more quickly than stone. |
 |
|
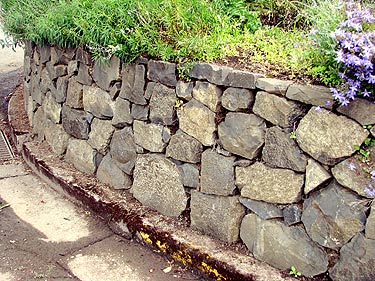
Above: Concrete wall products are easier to install, but remember, easier is rarely better. Below: Tough to beat the charm of a random stone, tightly fitted stonewall, not a difficult two-person, homeowner project. |
|
 |
PATIOS
Homeowners list patios as the number one desired hardscape feature, and no wonder. A patio truly is an outdoor living space, great for family grill nights, neighborhood parties, or simply relaxing with a good magazine or book.
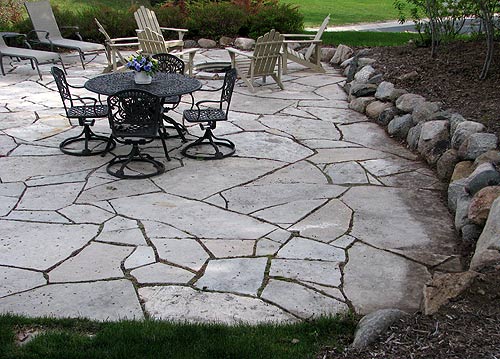
A patio should be placed so as to provide safety and privacy, which usually means the back yard. Because food and beverage are a part of patio living, place the patio in close proximity to an exit from the kitchen, if possible. Because trays of food and beverage are carried from the kitchen to the patio, a wide, sliding glass door from house to patio is best (they aren’t called “patio doors” for nothing).
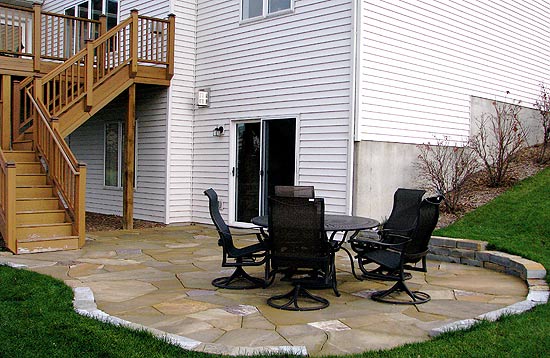
The size of a patio depends on the two Fs – function and furniture. Is the patio for family use only? Or do you like to entertain lavishly in summer? What size is the patio table, or do you want several tables, in addition to a hammock, a hot tub, plus ample space for containers? The biggest mistake in patio design is that patios are finished too small. The smallest patio table – round, and seating four – is usually three to four feet in diameter. Add the chairs, plus space to push back the chairs, plus space to walk behind chairs that have been pushed back, and it becomes difficult to function in a patio less than twelve feet wide. A 144 square-foot patio (12’ x 12’) will have room for a small patio table, a few containers, and little else.
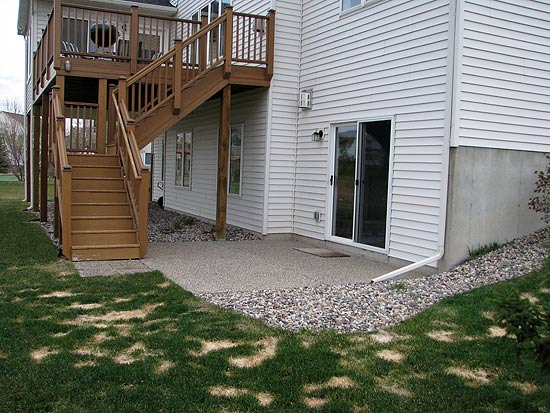 |
| BEFORE: The original patio installed by the builder is too small for any practical use. AFTER: The new stone patio is still relatively small, but large enough for a five-seat patio dining table plus two chairs and small table by the deck post in future. |
 |
A larger round or rectangular table that seats eight will require even more space. Plus don’t forget you need ample space for the grill. No one wants to party on your patio while getting their eyes burned from grill smoke. Design your patio so there is space for the grill along the perimeter, at least ten feet from the main patio table. Consider also the direction of prevailing wind.
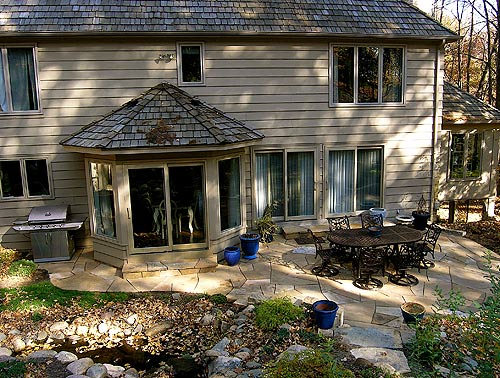 |
| The patio extends to the left to hold the barbecue grill, separating the heat and smoke from the patio diners and revelers. |
There is no good reason to create a patio entirely bounded by straight lines. Think kidney beans and putting greens. Odds are, a good portion of your patio’s perimeter will be edged by lawn. Dig up the lawn and create three- to four-foot-wide planting beds along the patio’s perimeter, halting the beds for one or several access points to the yard. These beds can be filled with shrubs (particularly pyramidal evergreens) to add privacy and create more of an impression of an outdoor room. Now you have a true oasis.
SIDEWALKS AND PATHWAYS
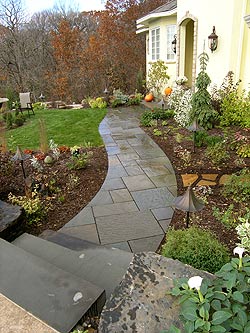 |
| A four-foot width is minimum for sidewalks to a main entrance. |
Sidewalks are primary traffic ways, usually from the street to front door, or garage apron to front door. You don’t walk them much (you use the door to and from the garage) but your guests will. Sidewalks to the front door should be a minimum four-feet-wide to allow two people to walk side-by-side. There is no reason to use straight lines in their design. A curving sidewalk from apron to front door, a subtle S-curve from street to front door, will evoke the sense of a river.
Sidewalks form strong concept lines, the lines immediately seen when one glances at a landscape. If your front door faces the street, odds are you have a sidewalk that links the garage apron with the door. On one side this creates a foundation bed – the area between the house and the inner edge of the sidewalk. On the outside edge there is lawn. Dig up some of the lawn and create a slender garden bed on the lawn side that starts at the apron and curves along the outside edge of the sidewalk toward the front door. Now the sidewalk runs through the landscape – plants on both sides. You’ve added size to the foundation bed – it jumps the sidewalk and continues outward.
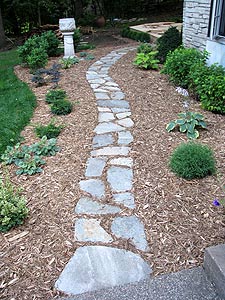 |
| In redesigning this too-small foundation bed, I tripled its width to allow for a stone pathway down the center, its destination a new deck area. |
Pathways are secondary traffic ways, such as a pathway from side yard to back yard or through a garden portion of the landscape. Choices of hardscape materials for pathways include bricks, concrete pavers, stone steppers, gravel, wood chips and shredded mulch. Width depends on the pathway’s function. If the lawnmower or wheelbarrow will encounter the path, you’ll need a width of three feet. If the pathway meanders through a garden planting area, make it narrower and make it curve, so that the viewer must step slowly, eyes down, studying the plants.
WALLS
Retaining walls are one hardscape feature where the particulars of your property’s grade may dictate placement more than any creative thoughts you have on the matter. If your driveway was cut into a hill and the hill is eroding away, well, that’s where you’d better place a retaining wall.
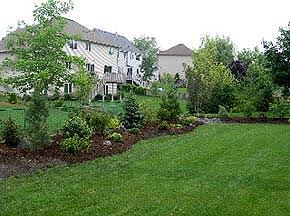
Retaining walls are a design ally, however, if you’d like to add elevation to your landscape. If your back or side yards run flat to the street, or neighboring property, consider running courses of concrete retaining wall block along your property line, facing out toward the street or adjoining property. Height of this “false back” is up to you. At each end, curve the block wall into your property, stepping down the courses of block as they end. Order a delivery of however many yards of soil it takes to fill the area encompassed by the retaining block, and presto, instant hill. Now you can plant it – complete with a stream, waterfall and pond, should you so choose.
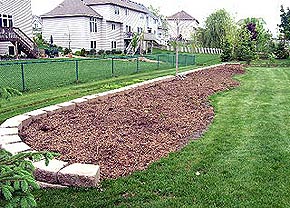 |
| ABOVE: Here’s a “false back” concrete retaining wall, placed along the back yard property line, to create a raised bed, ready for planting. BELOW: Here’s the finished product. New height to a flat lot, and you don’t view the retaining concrete block (your neighbor does). |
 |
Freestanding walls are a commanding hardscape feature. Too often homeowners look at their yards and see only the property lines as suitable locations for freestanding walls. A wall can be constructed anywhere it serves the function of separating one portion of the landscape from another. Walls can create garden rooms, add privacy or definition to a patio, separate a yard or garden from wooded areas, or hide unsightly structures such as an air conditioner or compost bin.
BOULDER OUTCROPPINGS
Naturalizing the landscape through the placement of boulder outcroppings is a growing trend. You are adding permanent, natural color and texture, while greatly expanding your options when placing plants. An ornamental grass or dwarf conifer growing with other plants looks nice, but plant a grass or conifer in front of a boulder outcropping and it looks fantastic.
Most important when adding boulder outcroppings is that you have enough of them. Add a boulder here and one over there and you’ll sense there are not enough. To look natural, there must be enough boulders clustered here and there, with the odd ones in between, to look as if the retreating glacier left them. Boulders used as outcroppings must be of sufficient size, a collection ranging from eighteen to twenty-four to thirty-six inches or more.
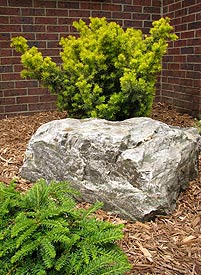 |
| To look good, boulder outcroppings need ample density of boulders in the view. |
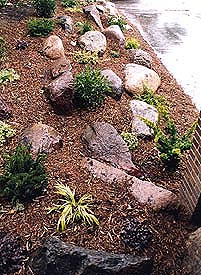 |
Boulder outcroppings need not be present throughout the entire landscape. You can feature outcroppings in the back yard landscape, or side yard hill, without carrying the look across the entire property. Where they appear is where the glacier left them. Always bury enough of each boulder below ground that it appears as a true outcropping.
Homeowners who attempt to create boulder outcroppings often use only boulders small enough to pick up, or roll easily. The result is underwhelming. The do-it-yourselfer needs either to rent a Bobcat or coerce plenty of help. Come to think of it, if you want boulder outcroppings, hire it out to a landscaper. You’ll go out and rent a Bobcat for $220 for five hours then discover it takes two hours to figure out how to safely get it off the trailer.
Then you’ll pick up a boulder in the bucket, hit the left pedal with your heel instead of your toe, dump the boulder on the cage above your head, dent it, freak out, pop a wheelie, turn, and lay the Bobcat on its side. When you tip in a Bobcat, the side of your head slams hard, once, on the side of the steel cage, and you cut your ear.
Now you need to pay $120 for a tow truck to show up with a tall cable tower to winch the Bobcat back up onto four wheels. Next you need to drive the Bobcat back onto the trailer, except you will swear to Christ you are never going back inside the damn thing, so you’ll coerce your neighbor to drive it up the ramps, and he’s never driven one, so it takes him two hours to get it back on the trailer. Then you chain it improperly, get pulled over by a cop on the way back to the rental place, that’s a $110 dollar ticket, then when the rental guy sees the damage, you get hit with another $350.
So the Bobcat winds up costing you $800 and you never set a single boulder. Hire a landscaper to do your boulder outcroppings; it will take them about two hours and they’ll charge $600.
GARDEN EDGING
Here’s where smaller boulders that you can pick up serve as a wonderful hardscape feature. If battling clay soil, consider raising the planting beds. Outline the beds using twelve- to fourteen-inch boulders, backed by landscape fabric. Careful, turning and flipping the small boulders so they nestle together tightly is addictive. Till organic material six inches down into the clay, then add good garden soil to just above the top of the boulder edging (it will settle a few inches). Now your beds contain good soil to a depth of around twenty inches.
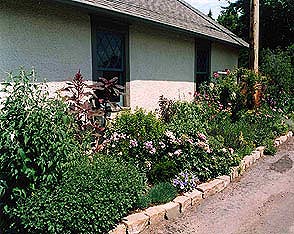 |
| Cobblestones are the perfect garden edging for this funky, back-of-garage, alleyway garden. |
Concrete retaining wall block, quarried wallstone, or stacked, broken pieces of flagstone may also be used in this manner, depending on the look you wish to achieve. Again, natural stone will always make a more charming garden edging than concrete block.
D-I-Y RESOURCES
Absent from this discussion are smaller hardscape items such as arbors, benches, fountains and gazebos. Bookstores, libraries and the Internet contain ample resources on how to incorporate these more mobile items into your design. One key design hint: Design the overall landscape first, i.e., the Big Picture. The little spaces – the best place for a garden bench, birdbath, sculpture, etc. – will best be seen after designing the big spaces.
The projects noted in this article obviously are a great deal of work for the do-it-yourselfer. Again, books and Internet guides are available that give step-by-step instructions for building retaining walls, patios, etc., but if you live in USDA Zone 5 or colder, be forewarned that most are written without regard to northern climates. They always err in regard to excavation depths, base preparation, and other cold-climate engineering factors.