RENEGADE GARDENER™
The lone voice of horticultural reason
Grow Your Own: Successful Home Vegetable Gardening
 3-12-10 – It’s the trend that could kick-start the stagnant gardening industry: In 2009, nearly fifty percent of American homeowners grew some form of “edible” in their gardens, and for 2010, research shows the percentage will rise. The coolest bit of news is that the largest number of people starting food gardens fall into the 25 to 44 age bracket, a younger demographic that reflects the desire of parents to save money on food while providing fresh, great tasting vegetables, fruits, herbs for their families.
The bad news? Almost twenty-five percent of gardeners who grew edibles in 2009 aren’t continuing for 2010. Their reason? Lack of success. (“Edible(s)” is the new, hip term being bandied about, inclusive of vegetables, fruits, and herbs. I like it, but think that “vegetable garden” already implies fruits and herbs, so I’ll call a vegetable garden a vegetable garden, while referring to a single plant as an edible.)
 Ready to try it, and be successful? What I’ve prepared here is an outline of the principles to understand when it comes to starting and maintaining a vegetable garden.
Never forget the first rule of vegetable gardening: If you grow it, you have to eat it. So you want to do everything possible to grow tasty, good-looking, disease-free produce.
LOCATION
Your vegetable patch must receive full sun. Sunrise to sunset is ideal (that’s also called farming), but such luxurious sunlight exposure is not often found in residential properties. So the minimum amount of direct sunlight hours is six. These six hours should include the peak midday sun period from 10:30 or 11:00 a.m. to 2:30 or 3:00 p.m. That’s four hours, so if you can tack on two more at some point during the day, even late afternoon, you’re good to go. But again, the more hours of sunlight beyond six, the better.
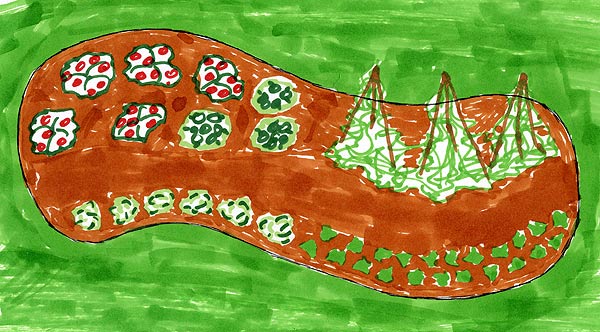 |
| A vegetable garden need not be a rectangular eyesore. |
Here’s something people forget: Pick a spot in your yard that won’t encounter shade in the years to come. Tree canopies grow broader over time. Try to find a spot that is sunny in summer now, and sunny ten years from now. As with every gardening rule, there are exceptions. Spinach and a few other leaf vegetables will grow just fine in partial sun (spinach, in fact, prefers it), so you need to research each edible you choose to grow.
What if the only full-sun location is in your front yard? Then place your vegetable garden in the front yard. If your neighbors mutter mild objection, they’ll cease that nonsense the day you drop off a box of fresh-picked tomatoes, peppers, carrots, lettuces or whatever. If any city ordinance nonsense sputters to life, some form of legislation dictating location requirements for home vegetable gardens, rally your fellow citizens and vote the bums out of office. It’s your property.
Besides, your vegetable garden needn’t be any form of eyesore. It needn’t be a rectangular box or series of boxes besmirching the front lawn. If an island bed, it can curve as would a flowerbed. Plant a swath of blooming shrubs on the north side. Vegetable gardens also can be designed into any perimeter landscape bed that receives full sun.
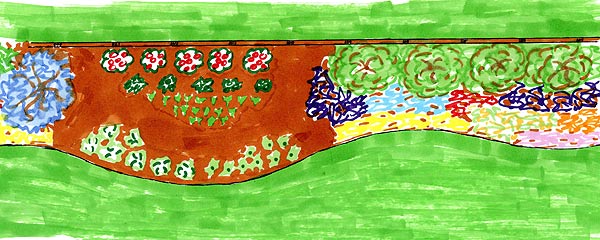 |
| Design your veggie patch into a sunny stretch of the perimeter landscape border. |
Just be sure you have access to all the plants. A four-foot width is ideal for island vegetable gardens—without stepping into it, you can access two feet into the garden from one side (for watering, weeding, fertilizing and harvesting), and two feet into the garden from the other side. If your vegetable garden is wider, put a pathway through it.
 SOIL PREPARATION
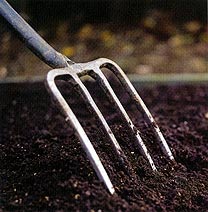
Soil prep is key. A vegetable garden needs friable soil to a depth of between eight to twelve inches, depending on what you plan to grow. “Friable” means it’s loose, easy to dig, and it crumbles in the hand. You get it by mixing in a goodly amount of organic matter, preferably compost and composted manures. Peat moss is my last choice for a soil amendment; it’s wimpy and doesn’t last much more than a season. It’s good in combination with compost, however, as it mildly acidifies the compost.
Virtually everything you will be growing is going to grow best in a slightly acidic soil, with a pH between 6.5 to 7.0. Blueberries need it quite acidic, a pH around 5.5. So after amending your soil, a soil test may be in order. At least find out the pH (accurate pH meters are now sold at most good nurseries and available online). If your native soil is very alkaline, say 7.5 to 8.0 or more, and the organic amendments you add are neutral or slightly alkaline, plant health and yield will be adversely affected, even to the point of complete failure. Tilling in soil sulfur is the best way to lower soil pH, but it takes a year to start having effect, and should be repeated about every three years, based on future pH readings. The Internet and your local university extension service office can provide plenty of help for lowering soil pH.
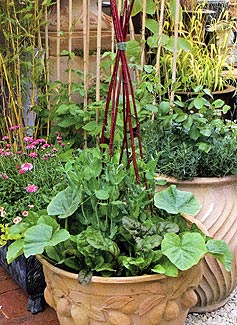 The alternative to working the soil into shape is to grow your edibles in containers. Maybe the sunniest spot on your property is the deck or patio. Containers are perfect, and you can grow any edible in them. Use the organic, “soiless” potting mixes available at good nurseries. They are combinations of peat moss, composted forest products, perlite, sometimes a bit of sand. Very light and a perfect mix for edibles. Some of these mixes come with a time-release fertilizer mixed in. If not, you can either apply granular fertilizer to the soil as you fill each container, or fertilize your containers with a water-soluble synthetic fertilizer. I don’t worry about using water-soluble fertilizers in containers, since there are no soil microbes or earthworms in the soil to worry about.
 SOWING AND PLANTING
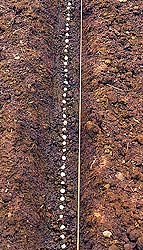
It’s up to you to research the planting and specific growing requirements (watering rate, fertilization recommendations) for whatever edibles you choose to grow. Everything you need to know about what you choose to plant is available online and in books. Google “growing zucchini” and you’ll pull up 10 pages of university papers telling you everything you need to know. But what I will hammer home here is that in vegetable gardening, soil temperature is everything.
Meaning, you need to buy a soil thermometer. Much of what you will be growing you will seed directly in the garden. Seeds germinate at varying soil temperatures. Seeds of many leaf vegetables such as spinach and lettuces will germinate in cool soils, while sweet corn seeds require soil to reach 68 degrees before germinating. If you plant some seeds too early, they will rot before the soil gets warm enough to induce germination. So buy a soil thermometer, research the germination temperatures for the seeds you are going to plant, and when the soil temperature in spring climbs to two degrees below the germination temperature, get the seeds in the ground.
Soil temperature is also critical to the planting of prestarts. Prestarts are plants you purchase at the nursery or that you grow from seed indoors in late winter. Tomato and pepper plants are the most popular. Both are hot-season crops. You see them for sale in their little containers at the nursery at least two if not three weeks before soil temperatures are warm enough to plant them in the garden (tomatoes, 62 degrees, peppers, 64 degrees).
Inside the nursery greenhouse, they are cruising along at 70 degrees, then you plant them in April or May because you’ve had some sunny, warm days, and it turns out your soil is at 55 or 57 degrees. Not only that, but those 60 or 70 degree temperatures you’re having during the day still mean 45 to 55 degrees at night. Tomatoes and peppers are immediately shocked, both roots and plant, and while they don’t die, they struggle and don’t deliver decent yield at harvest. In Zone 4, expert tomato gardeners wait until May 30, on average, to plant their tomatoes and peppers. In Zone 5, the date is May 18, and in Zone 6, it’s May 6.
These are average dates. It is soil temperature, however, not the calendar date, that dictates when to sow seed and plant prestarts. You need to research and know the correct soil temperature for sowing and planting what you have chosen to grow in your vegetable garden.
WATERING AND FERTILIZING
Maintaining proper moisture levels around plants is crucial. Trees, shrubs, perennials and annuals all can withstand a bit of stress from lack of moisture, bouncing back pretty well if a few days or even a week go by while they’re thirsty. Edibles will also bounce back, but at great harm to plant health, disease resistance, and yield.
The classic case of improper watering leading to crop failure is blossom end rot on tomatoes, caused by allowing the soil around the tomato plant to become too dry. If the roots remain dry for just a few days, they are unable to absorb calcium. You might get away with it once, but a few times more and end rot will result.
 Mulching around all your plants greatly reduces water evaporation and helps keep the soil and roots cool. Mulch also keeps fungal spores in the soil from splashing onto plant leaves during rainfall and watering. Shredded bark, any of the various husk mulches, dried grass clippings, and compost are good mulches in the vegetable garden.
Apply a two- to three-inch layer of mulch around each plant, pulling the mulch away from the base of each plant to create a six-to eight-inch circle of soil. Don’t apply mulch too early in spring; you need to let the sun sterilize your soil each year, to diminish fungal spore population. Freezing temperatures in winter do not kill fungal spores; spring sunshine does. In Zones 3 & 4, the earliest date to apply mulch is June 15; in Zone 5, June 5; in Zone 6, May 26; in Zones 7 & 8, May 16. Let the sun get high and hot and sterilize the soil, then mulch around the plants.
Buy a watering wand if you don’t own one. A wand turns the water into a soft shower that doesn’t splash off the mulch, or bore holes in it if watering directly from a hose. Water around the base of each plant, trying to get as little water on the plant’s leaves as possible. Never water the plant directly, and never use a lawn sprinkler to water a vegetable patch. Funguses grow in moisture, and fungal diseases will flourish on plants that are repeatedly splashed with water while watering.
You need to research fertilization rates for the edibles you choose to grow. If you have amended the soil with a goodly amount of compost, and top-dress your vegetable garden with an inch or two of compost each fall after harvest, fertilization may not be necessary. If you do fertilize, use an all-purpose organic granular fertilizer. Try to avoid synthetic, water-soluble fertilizers. They work fast, but they greatly reduce the level of microbe activity in the soil, so it’s a tradeoff. Consistent applications of organic granular fertilizers help keep healthy soils healthy.
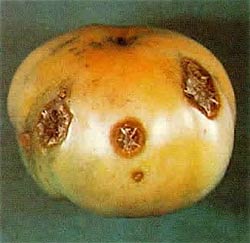
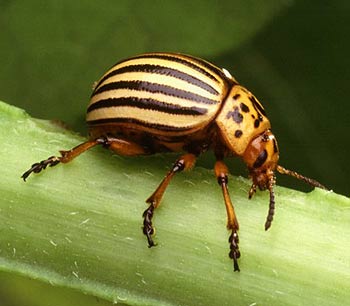 |
| Potato Beetle, a very Bad Witch. |
MONITORING AND MAINTENANCE
You need to watch a vegetable garden closely. A walk-through every day is recommended. Note the foliage on each plant as it develops in spring. Then, if the foliage changes in appearance (usually color, curling, or spotting) you know something is wrong.
You need to watch for insects, and this involves inspection of the underside of random leaves every few days. If you see insects flying around the garden, spot them on leaves or stalks, notice any type of tiny, globule-like egg on the plants, don’t immediately reach for an insecticide. First, you need to identify the insect. You need to find out if it’s a Good Witch or a Bad Witch. Capture a few in a plastic bag; if tiny, a magnifying glass comes in handy.
It’s easy to ID garden insects online. Google “garden insect identification” or somesuch, and you’ll pull up all sorts of sites with photos so you can make a match. Texas A&M has a nice one I’ve used, but there are plenty of others. These sites will also recommend control measures, if the insect is a pest. Remember though, spraying with an insecticide will probably kill Good Witches also. You’ll learn; if you see a few aphids whizzing around, but also spot lady beetles, well, you have some Bad Witches, but some Good Witches have shown up to see what they can do about it. You may not need to do anything.
The same goes for fungal diseases. A little powdery mildew or fungal spotting in mid-season, why spray? Remove the leaves and dispose of them. If it’s late in the season, around harvest time, I wouldn’t get concerned. Early season fungal problems, or major problems by mid-summer, or recurring fungal problems that seem to be getting worse every year—now you probably need to take some action.
PEST INSECT AND DISEASE TREATEMENTS
If you are going to purchase some form of commercial insecticide or fungicide, the first thing to understand is that it’s not a choice between chemical products and organic products. Your choice is between synthetic chemical products and organic chemical products. Either way, it’s a chemical. Sometimes a person will come up to me when I’m giving a talk and ask about how to control this problem or that, and before I can answer they will add, “But I don’t allow the use of chemicals in my garden.” If you catch me when I’m tired, and feeling a bit ornery, I might say, “Really…how in the world do you get anything to grow without H2O?”
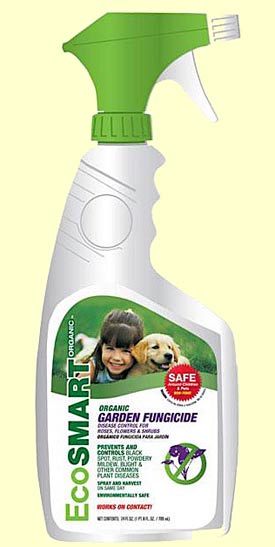 H2O, of course, is the chemical equation for water. Everything is a chemical. 95 percent of the gardeners in the world don’t understand this. Organic chemicals mean that they have a carbon atom in their equation, a nerdy scientist explanation I don’t understand, so a general definition of organic chemicals is that they are created from plants, animals, or natural deposits found on Earth. Synthetic chemicals, on the other hand, are created by evil white Republicans in lab coats. Try to keep these two definitions firmly in mind as we proceed.
The false assumption made by gardeners is that organic chemical products—soaps, oils, copper fungicides, all manner of liquids and powders and gels sold at nurseries and labeled “Organic”—are safe to use, and do not harm the environment. The truth is, some synthetic chemicals are safer and less harmful to the environment than some organic chemicals, and some organic chemicals are safer and less harmful to the environment than some synthetic chemicals. It all depends on the chemical.
Cornell University studies all manner of synthetic and organic chemicals and their impact on the environment—how does the chemical affect fish, birds, insects, mammals, what does it do to soil, how long does it last in the soil before breaking down, does it possibly contaminate ground water, every environmental impact you can think of—and has developed the chemical EIQ, or Environmental Impact Quotient, a number that is assigned to chemicals so we can judge their overall toxicity to the environment.
Here is the EIQ chart for some common garden chemicals:
| Pyrethrum | 18.0 | Organic |
| Pyrethroid | 18.0 | Synthetic |
| Hort. Soaps | 19.5 | Organic |
| Carbaryl/Sevin | 20.9 | Synthetic |
| Acephate/Orthene | 23.4 | Synthetic |
| Hort. Oils | 27.5 | Organic |
| Rotenone/Bonide | 33.0 | Organic |
| Captan | 15.8 | Synthetic |
| Copper Hydroxide | 33.3 | Organic |
Note the first two on the list. Pyrethrum is an organic chemical widely used in organic insecticides. It is derived from the dried flowers of two varieties of Chrysanthemum. It’s a nerve toxin, extremely lethal to insects. It’s also used in wasp sprays because of its ability to kill all types of bugs. Adult humans have enzymes in our brains that render pyrethrum fairly harmless, although if you get a whiff of it when you are spraying, your eyes will water and you’ll have a few seconds where you gasp for breath. Infants, however, do not have this immunity, which is why you should never use a wasp spray in the nursery with the windows closed while the baby is sleeping, because the baby might not ever wake up. But overall, pyrethrum is a nice, very commonly used organic chemical, with a low EIQ (anything below 20 is considered extremely safe for the environment).
Pyrethrum is approved for organic farming, and organic farmers use it all the time. Brings up another myth, people who buy organic produce do so because they think none of it has been sprayed with chemicals. Utterly false. Organic farmers are like any farmer, they sometimes get insect infestations and fungal diseases on their crops, and if they don’t spray, they lose the crop. So they spray with approved organic chemical treatments, such as Pyrethrum.
Now, the evil white Republicans in lab coats can duplicate virtually any organic chemical in the laboratory, and they do. They make pyrethrum but because it is a synthetic version, they have to call it something else, so it is know as pyrethroid. Same exact stuff as pyrethrum, same EIQ, except because they are scientists, they can slightly alter the chemical so it works faster. This allows regular, non-organic farmers to use less of the chemical than their organic counterparts. Pyrethroids are also a lot cheaper, because you don’t have to harvest chrysanthemums, dry them, and extract the chemical. So now you have one hint as to why organic produce is more expensive than conventional produce.
Next, look at the soaps. These are organic, but remember, all soaps are chemicals. Pour a few ounces of these soaps into a fishpond, and the fish die. Get some soap in your eyes when washing your face, it stings. Swallow soapy water, you throw up. Get it? Soap is always some form of toxic chemical. The insecticidal soaps have a low EIQ, which is why I use them as my first choice if I have an outbreak of Bad Witch bugs in the vegetable garden.
The problem is, soaps work only on soft-bodied insects, such as aphids, thrips and spider mites, at only a 40 to 50 percent kill rate. So if you are battling a major infestation of these pests, or any infestation of hard-shelled Bad Witches, you may want to use a synthetic chemical product such as Sevin (carbaryl) or the Ortho-brand products (usually acephate). Used according to label directions, they are not going to induce any great or lasting harm on your soil, residue in the produce, future gardens, or the environment.
But maybe you think the best thing is to use only organic products, so at the nursery your eye catches the “For Organic Gardening” message on the label of the horticultural oils used by organic gardeners (and organic farmers). Check the EIQ number above, and watch out—the organic chemical product (oil) is more harmful to the environment than the two commonly used synthetic chemical products.
You know what oil is, right? These organic products are all derived from crude oil, and if you happen to kick over the bottle while mixing the stuff in a sprayer, the oil contaminates the soil and kills microbes and worms and makes it tough to grow anything there in the future. It stays in the soil a long time, and potentially can seep into groundwater. Most synthetic chemicals don’t.
Another popular organic chemical used for years by organic farmers and gardeners was Rotenone, a very nasty chemical found in the roots and stems of a few plants. Makes a very good insecticide, but check out the EIQ. That’s why the EPA banned it for use by organic farmers back in 2005.
When it comes to fungicides, one of the most popular organic treatments you can buy at the nursery (and yes, one of the most common fungicides used by organic farmers) is copper hydroxide. It’s an organic chemical. “All Natural” of course, and it works like a charm, but it’s very toxic stuff, with a higher EIQ than virtually all synthetic chemical fungicides (particularly Captan, which is very safe and is widely used by conventional farmers). But in order to retain their organic certification, the poor organic farmers have to use it, instead of a safer, synthetic chemical.
By the way, now that universities are finally testing organic produce sold at grocery stores for traces of chemicals left over from spraying, guess what—they’re there. Nothing to worry about, they are in minute quantities, a few parts per million, same as conventional produce. And luckily, as with conventional produce, the chemicals found in organic produce pose zero risk to your health. Just thought you “organic only” consumers should know.
It’s all marketing smoke-and-mirrors. The companies peddling soaps and oils are sharp, they don’t call them “insecticidal soap” or “insecticidal oil,” they call them horticultural soap and horticultural oil. “Horticultural oil,” my goodness, it’s all-organic, that certainly isn’t going to harm the environment. “Organic Fungus Treatment” is what you’ll see as the big print on the labels for products containing copper hydroxide. It’s all deception. The biggest threat to the environment, to your birds and good bugs and soil and your future gardens, is the overuse of organic chemical products because gardeners think they are safe and don’t harm the environment. So they use them in greater quantities, and more often, than the label recommends! Don’t forget, whatever product you use, IT’S A CHEMICAL.
My advice is to do the first things I’ve talked about: Grow you edibles in full sun, in good soil, water them properly, fertilize as necessary, keep plenty of space between plants for good air circulation—these are the true “organic” procedures you can trust. These all lead to healthy plants that are less susceptible to fungal diseases and pest infestations. If you start encountering fungal problems that are threatening to kill a plant or are getting worse each year, start a spray program with a synthetic chemical fungicide. You won’t find an organic fungicide that’s safer for the environment. Once in awhile those evil white Republicans in lab coats actually set out to create a synthetic chemical that will replace the organic chemical being used, in an attempt to lessen any adverse impact of gardening and farming on the environment. Hard to believe, I know.
 By all means, stick to organic gardening principles as much as possible. I do. If you encounter Bad Witch insects, worms and beetles, etc., you should first try picking them off by hand and dropping them in a bucket of soapy water. Moderate aphid infestations can be controlled by the occasional sharp spray of water from the garden hose. If insect problems persist, or get out of hand, try soaps first, and if they can’t handle it, move on to a synthetic chemical that does.
HARVEST
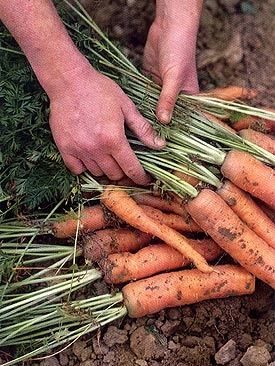
You will want to research and learn the harvest times for everything you grow, but don’t go by the calendar. The best way to know when to harvest is to taste test. In general, you want to harvest edibles in the early stages of maturity. If it’s carrots, a week before the period from seed germination to harvest given on the seed packet, pull one and eat it. Maybe they are ready. Maybe they are better in a week, or two.
You can extend the harvest through the use of cloches (mini-greenhouses used both to start seeds early in the garden and protect from frost late in the season) and bed sheets tossed over the garden if the forecast calls for light, early frosts.
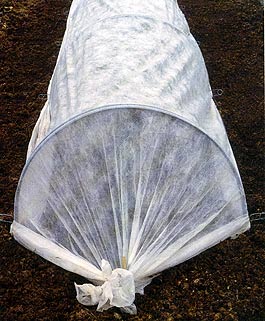 |
| Cloches are available at nurseries and online. |
When you harvest, use sharp knives and bypass pruners. Sterilize these tools as you move from one type of edible to another by sloshing them in a solution of nine parts water to one part bleach. You can also wipe blades with a cloth dampened by rubbing alcohol.
Clean up all leftover plants, foliage and other plant debris at season’s end. Get ‘em completely out of there. Now is a good time to spread an inch or so of compost over the garden. Let is sit over winter. In spring, don’t till it in, just let it sit there. In fact, if you use a power tiller to start a vegetable garden bed, don’t till it after that. For heaven’s sake, don’t till it every spring. Soil structure takes several years to get established. This is why vegetable yields generally increase the second and third years. You rip that little Mantis in there every spring, all you are doing is killing worms and ripping the soil into silt, lowering microbe populations and completely ruining the nice structure you had going.
Don Engebretson
The Renegade Gardener