RENEGADE GARDENER™
The lone voice of horticultural reason
Spring Tuning
5-1-2013 – Spring is marked by myriad means, an alignment of the heavens (Spring/Vernal Equinox), that triggers a date on a calendar (March 20, this year), by the emergence of new buds on woody plants, the hello-chirp of robins, the swelling passion of the poet, the flooding of basements for those what have ‘em, and the flooding of nursery shelves with annual flowers and vegetable varieties that shouldn’t be planted in the ground for at least another month.
Most important to this Renegade Gardener is that the heart of the spring season – May 1 – signals the final new column and full update on this site until November 1, when a fresh dispersal of horticultural heresy resumes. After this update I take five months off, in order to devote myself fully to my landscaping business. I am not saying goodbye; June 1 through October 1, I will do monthly, hurried and slapdash updates to the Current Column, just to say hello and recommend a few articles from the archives. Come to think of it, some of you may not notice a difference.
So the pressure is on, and as I am writing with the windows and sliding patio door to my study wide open amid a sparklingly sunny, warm, Minnesota spring day (finally!), I will let my renewed passion for gardening wash gently across a variety of subjects, under the broad umbrella of Spring Tuning.
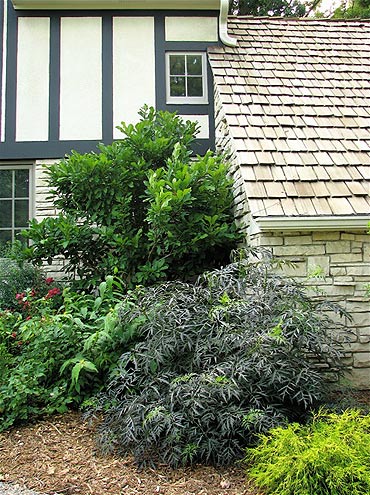
Spring Shrub Care
Give the base of your shrubs a good cleaning. No, shrubs in the wild do not get annual base cleanings, and eventually they suffer for it. Leaves and other plant debris that have collected down deep into the base of multi-stemmed deciduous shrubs in the fall and winter can build up and suffocate, never killing the shrub but making it work harder than need be.
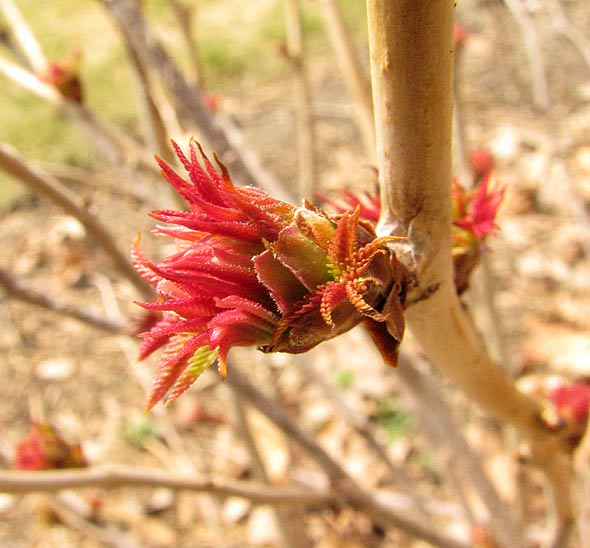
 |
| Spring shrub maintenance leads to summer beauty. |
Evergreen shrubs such as Arborvitae, Chamaecyparis, Macrobiota, Yew and Juniper can lose base growth and look sparse as debris builds up, holds moisture, and rots branches and foliage. Particularly prone to base-growth demise are the fabulous low, blue, spreading Junipers. Clean the base – it’s in there somewhere, no doubt near the center – of all organic debris, allow the sun in there to dry out the base and trigger new bud break, gently lift and shake and swat each sprawling, ground-hugging branch, particularly freeing it from soil clods that have heaved up and embraced their underside. I recommend donning tight latex gloves, as used for dishwashing, which provide for nimble fingers with which to snatch leaves, needles, errant mulch and other debris.
Have a bypass pruner in your back pocket or in a proper sheath, grab it as needed to cut off dead portions of any evergreen shrub, they’re showing now, brown and orange will never go back to green. If it’s not green, it goes. Work quickly, diligently, with purpose, your only goal perfection. Then give all your shrubs a nice hard blast of water from the hose, which further cleanses them of dust, airborne soil and pollutants.
Then fertilize all your shrubs, and small trees, with an organic granular fertilizer, if they need it. Do they need it? If your soil is clay or sandy or otherwise poor, they do. If the plant is struggling and less than lush in summer and you can assure me it is getting enough sun, it does. Circle the base of the plant widely at the dripline with the proper amount, scratch it in with your three-prong hand hoe, and water the shrub. If your soil is good and dark and crumbles in the hand and you always amend soil with compost and mulch with organic mulch and replenish the mulch as it dissipates into the soil and last year most everything looked fabulous, your plants do not need fertilization.
The New RG Anal Rating
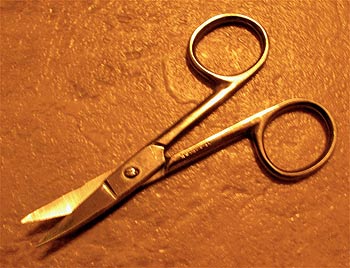 |
| In certain hands, this is a gardening tool. |
The Renegade Gardener Anal Rating, or RGAR (spoken, “Rigar,” rhymes with “cigar”) is new to the site this month, by which I rate gardening duties on a scale of 1 to 10, 1 being absolutely obligatory, such as watering plants and mowing the lawn, and 10 being something only I would do, such as deadheading vast swaths of Coreopsis verticillata ‘Moonbeam’ one microscopic flower stem at a time using a Revlon toenail scissors. At least until I came to the blessed realization that Coreopsis ‘Moonbeam” was perhaps the most vacuous perennial of all time, and tore it all out. Another 10 would be delicately scoring the threadlike, milky white, tightly bound roots circling the tiny soil balls of annuals purchased in flats with an Exacto knife prior to planting. In truth, you needn’t do anything to them.
A middle-of-the-road 5 on the RGAR scale would be pruning dead branches from evergreen and deciduous shrubs once a year, late spring, after you can discern what’s alive and what’s dead. Your shrubs look and grow better but most people don’t notice. A 3 would be the deadheading of perennials as a normal gardener would do it, with a proper bypass pruner, removing all spent flower stems down to the basal foliage, after the entire thing has flowered and the final flowers are beginning to fade. A 3, really? Yes. Deadheading perennials is close to obligatory. Even if they don’t grant a second wave of bloom (some don’t, most do), they look better. Dividing perennials would be a 2. Sure, you can ignore it, year after year, for a substantial majority of perennials and for as many years as eight to ten, at which point you will learn why dividing most perennials every three to four years has an RGAR of 2.
A 7 on the RGAR scale would be starting, and maintaining properly, a compost pile. Despite their romanticized, earth-hugging pedigree, I doubt many more than one in five astute gardeners has one. If you’re not constantly experimenting with new perennials, digging up, dividing, and moving old ones, particularly in poor soil, I think most semi-serious gardeners have discovered that purchasing five to ten bags of compost per year saves them time and isn’t much added expense. For gardeners with soil that needs enrichment and are tackling a major season of landscape plant implementation, they probably cannot make enough compost to furnish their needs, and so order up a steaming delivery of six to twelve yards of the stuff.
Personally, I wouldn’t do without a compost pile, I think for the same reason that greater satisfaction is gained from eating tomatoes or green beans that you grew yourself versus those purchased in a store. The monetary saving from a vegetable patch is, in the end, nugatory. But you farmed, damn it, and doing so makes a beeline straight from your soul that links you in a highly cosmic way to your ancient origins in Norway or Germany or Egypt or Brazil or Samoa. When you grow vegetables you shake hands with your unknown ancestors who had much to do with who you truly are. That’s the appeal. The same exact principle is inherent in fishing and hunting, by the way.
Composting
So it is with compost you have made versus that which is purchased. It just works better, it knows, somehow, that you had a hand in it. Learn to compost and after two years you always have some around. My best compost pile was at my first house, a splendid three-bin affair. The first bin was 4’ wide by 5’ deep by 4’ high, a rectangle constructed of green, steel fence posts, those things with the flat stabilizing wing piece near the end that you pound into the ground using a hand sledge. They were six-footers, sunk nearly two feet into the ground, one at each corner and one halfway along both five-foot sides. The bin walls were wire mesh dipped in green plastic, purchased in a 4’ by 25’ roll. Don’t use chicken wire, it rusts. Right next to it, sharing an interior 5’ wall, was a duplicate second bin.
Both bins had access from the front by cutting the fencing so that the ends of it could be curled by hand to hold tight to the front-left corner post. Unbending the wire allowed the front section of fence to swing open as a gate. Eight inches from the second bin was a 4’ x 5’ wooden bin, constructed of 4” x 4” wooden posts at each corner and sided with 1” x 8” cedar planks into which I had drilled numerous 2” holes. This one had a proper wood gate in front, with hinges and a latch. I spaced it eight inches from the wire bin in the middle so it had good air circulation through the holes on all four sides.
So picture three bins side-by-side. I filled the first bin, far left, with anything organic during my first year of gardening, deadheads, leaves, grass clippings, entire perennials cut down after frost, annuals that were spent, vegative kitchen waste and coffee grounds. Sometimes I dried the grass clippings but usually I didn’t, sometimes I shredded the leaves but sometimes I didn’t, if it was organic and wasn’t a tree branch I put it in the first compost bin. Thinking in terms of “greens” versus “browns” is unnecessary. A few times the first summer I tossed a few handfuls of high nitrogen lawn fertilizer on the pile, usually after adding a fresh layer of any substantial amount, and watered the pile with the watering wand for two minutes, to activate the fertilizer. Maybe three other times in the summer I watered the pile for two or three minutes, if rain had been sparse.
I should note that I had a half-acre lot with plenty of trees, too much lawn, though had eaten up some of it via creation of perimeter shrub and perennial beds. If your supply of organic material is lower than mine was, 4’ x 4’ is a sufficient size for compost bins, and 3’ x 3’ is minimum. Smaller than that, you don’t get enough heat. Sprinkling the pile with any formula fertilizer that includes nitrogen a few times a summer and watering it is the key to getting the pile(s) hot and speeding up the composting process.
After a year the first bin was full, so in the spring I opened the front, grabbed a pitchfork, and tossed it from the first bin into the matching, middle bin. This is so much easier than trying to “turn” compost when all you have is one bin. As I got near the bottom I could see I was already making compost. Now my middle bin was full and my left bin was empty for the arrival of fresh material. I started filling it. That fall I tossed the contents of the middle bin into the right-hand, wooden bin. It already had reduced in volume by close to half. By end of spring the following year, the wooden bin held rich, black, sweet-smelling compost. The middle bin held the composting material that would replace it the following year. The far left bin was again close to full.
So in just a few years, you have a compost system that delivers around one yard of compost per year, or 14, two-cubic-foot bags, give or take a cubic foot. And you use it to amend the soil every time you plant a new perennial, you throw a few shovelfuls into the hole when planting shrubs, you scatter some as top dressing around a new tree you planted, before you mulch it.
Where was I? Oh yeah. The RGAR for creating bins and making compost is 7 – far from obligatory but in no sense weird. The RGAR for the spring base cleaning of shrubs is a 5. Using yellow latex gloves instead of normal gardening gloves for spring base cleaning of shrubs is a 9. Mulching around trees at time of planting is a 1. Knowing exactly how often to water perennials, trees, and shrubs the first three years in the ground, and the proper amount of water to dispense, is a 2. Having a good grasp of pruning is a 3. Growing ornamental flowers from bulbs is a 6. In the RGAR scale, anything in the 1 to 5 range is required, if you call yourself a gardener.
Spring Perennial Care

Fertilize all your perennials once in spring, if they need it (as defined above) with organic granular fertilizer, after they show growth. RGAR 1. Keep in mind that in the second half of your gardening lifetime only a very few of the most fastidious perennials will require fertilization – roses come to mind – because your soil will be so good.
Divide perennials every three to four years. There are exceptions – peony, baptisia, actaea, geranium, many grasses if you like ‘em big – so Google the perennial. Sometimes it simply comes down to size preference. Sometimes it comes down to plant health, as with perennials growing from a woody crown where after three or four years the center dies out. Time to divide.
When you Google anything gardening, skip past the sites that are ads, skip past the commercial nursery sites, skip past the generalized Help and About and How-to sites (unless Renegade Gardener pops up, and it will) and head down the page to the university extension and botanical garden sites (“.edu”). University of Minnesota, Virginia Tech, Penn State, Missouri Botanical Garden, University of New Hampshire, University of Florida, Oregon State, really any college/university site that pops up with a paper on the topic you searched will give you about everything you need to know, without bias and advertising. You can stick with your state’s extension service, and if the perennial or topic isn’t covered, try a different university that shares your USDA Zone.
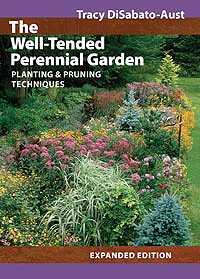 Gosh, how long has it been since I’ve plugged Tracy DiSaboto-Aust’s absolute Bible on growing and caring for perennials, The Well-Tended Perennial Garden (Timber Press). Twelve years? She’s published additional worthy books since, but if you are going to start growing perennials, or are into them and plan to stay there, this is the absolute must-have book. Buy it, read it, use it – this is the book that makes you an expert perennial grower.
In the fall, I still think it best to cut down perennials after they have succumbed to cold weather and withered into dormancy. You can leave them alone and deal with them in the spring, but springs are wet, and last year’s foliage and stems get gooey and sloppy. Potential for lingering fungal disease also runs higher. I like a clean slate in the spring. Keep in mind, there are some perennials – heuchera, tiarella, heucherella, ornamental grasses come to mind – that seem to overwinter better if you leave them alone in fall.
As for applying winter mulch to perennial beds in zones 2-5 in late fall after the ground has lightly frozen, to help them survive the winter, yeah, it helps. And you do it the first ten years you garden until you get tired of being out there when it’s twenty degrees, fluffing up pats of marsh hay over your perennials while your fingers freeze, gloves or no gloves. Then in the spring you have to remove it and deal with it (though it was a nice addition to my compost bins in the early years).
I quit winter mulching in zone 4 years ago, and now simply grow perennials that I know will survive without it. You get to a point as a gardener where you stop enabling your plants. In zones 2 and 3, I suppose I’d still do it here and there, mulching perennials for winter that would be heartbreaking to lose.
Spring Annual Planting – and Tomatoes
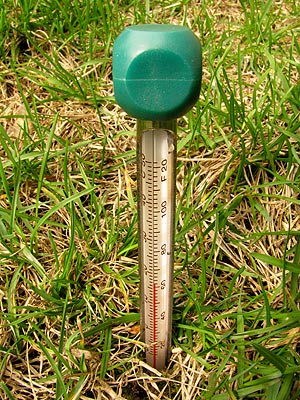 I realize my readers are scattered around the globe in myriad growing zones, so of course there is no specific date for planting annuals (or tomatoes, peppers, sweet corn). You do it based on soil temperature. It saddens me how few gardeners own a soil thermometer. They cost about ten bucks. You stick it two inches into the ground and wait a few minutes, then have an accurate soil temperature. Realize that the best time to get an accurate soil temperature would be at 3:30 in the morning, which I’ve done, and which is why nocturnal soil temperature expeditions have an RGAR of 10.
Checking your soil temperature in garden or vegetable beds between 7:00 a.m. and 8:00 p.m. has an RGAR of 4. You just need add intuitive reasoning. If last night had a low of 44 degrees, and at noon it’s sunny and 68, and hit 70 the day before, well, you may get a soil temperature reading of 60 degrees. But at night, the soil may dip to 57 degrees. But you’ve heard that it’s always safe to plant tomatoes once soil temperatures hit 60, so you plant. The soil, however, is not maintaining a constant temperature of 60.
Plus, tomato plants are not seeds, waiting for the proper soil temperature to germinate. They have leaves and stems above ground, and these parts of the plants hate it when they are exposed to temperatures below 55 degrees. So you have a tomato plant with roots being chilled at night in soil below 60 degrees, the part above ground is shivering in 45 or 50 degree temperatures in the middle of the night, and later in the season you wonder why you didn’t get a very large crop of tomatoes, and why they didn’t taste as good as last year.
Wait until your soil temperature never dips below 60 degrees, and the nighttime temperature never dips below 58 degrees, and plant your tomatoes. If you must. You’ll get even more and better-tasting tomatoes if you wait for soil temperatures to hit 65 degrees with nighttime temps never below 60. In zone 4, I tell people, wait until June 1 to plant. So what your neighbor beats you to the picnic table with his first crop of tomatoes. Your crop will be bigger, your tomatoes will be bigger, and they’ll taste better. You’ll have so many tomatoes, you can throw them at him.
Annuals, don’t plant until soil temperature is at a constant 60 degrees and you’re done with nighttime temperatures below 50 degrees. They were grown in a 70-degree greenhouse. They won’t die when you plant them too early, but as with tomatoes, cool soil and air temperatures shock them and they never grow into happy, healthy, lushly blooming annuals.
And don’t plant so many. In my first “flower gardens,” I think I planted about fifty percent perennials and fifty percent annuals. Now, I plant ninety-five percent perennials and five percent annuals. Yes, there are designs that scream for coleus. And I have nothing against curving swaths of impatiens (for however long you will be able to plant them until Impatient Downy Mildew hits your berg). Annuals are mainly for containers. “Oh, but I want color!” you moan. Keep it up, and I’ll do 700 words on red geraniums. Yes, we all want color, but you want color from foliage, intrigue from form, beauty from texture. Bloom color is a secondary concern.
Don Engebretson
The Renegade Gardener